Development Environment Setup
This chapter details the setup of the Jetson Orin NX development environment, covering the complete process from local development environment configuration to remote debugging and desktop access, aiming to help developers efficiently build a development system suitable for embedded AI edge computing devices.
1. Local Source Code Development Environment Setup
Prerequisites
-
Ubuntu host (recommended: 20.04/22.04 LTS, >100GB space, for cross-compilation)
-
Install necessary tools as follows:
sudo apt update
sudo apt install git-core build-essential bc flex bison libssl-dev
Source Code Deployment
- Download and extract the Linux_for_Tegra source code:
wget https://developer.nvidia.com/downloads/embedded/l4t/r36_release_v4.0/release/Jetson_Linux_R36.4.0_aarch64.tbz2
tar xf Jetson_Linux_R36.4.0_aarch64.tbz2
- Download and extract the filesystem:
wget https://developer.nvidia.com/downloads/embedded/l4t/r36_release_v4.0/release/Tegra_Linux_Sample-Root-Filesystem_R36.4.0_aarch64.tbz2
sudo tar xpf Tegra_Linux_Sample-Root-Filesystem_R36.4.0_aarch64.tbz2 -C Linux_for_Tegra/rootfs/
- Pull the kernel source code:
cd Linux_for_Tegra/source/
./source_sync.sh -t jetson_36.4
- Fetch the following code and overwrite the original source:
cd ../..
mkdir -p gitlab/Linux_for_Tegra
git clone git@gitlab.milesight.com:ai-developer/aibox/l4t.git gitlab/Linux_for_Tegra
cp -r gitlab/Linux_for_Tegra/* Linux_for_Tegra/
- Deploy NVIDIA Tegra components:
cd Linux_for_Tegra
sudo ./apply_binaries.sh
Cross-Compilation Toolchain Deployment
Download and extract the cross-compilation toolchain:
wget https://developer.nvidia.com/downloads/embedded/l4t/r36_release_v3.0/toolchain/aarch64--glibc--stable-2022.08-1.tar.bz2
mkdir -p $HOME/l4t-gcc
tar xf aarch64--glibc--stable-2022.08-1.tar.bz2 -C $HOME/l4t-gcc
Compilation Methods
Before compiling, configure the environment variables (required for each new terminal session):
cd Linux_for_Tegra/source
export CROSS_COMPILE=$HOME/l4t-gcc/aarch64--glibc--stable-2022.08-1/bin/aarch64-buildroot-linux-gnu-
export KERNEL_HEADERS=$PWD/kernel/kernel-jammy-src
export INSTALL_MOD_PATH=$PWD/Linux_for_Tegra/rootfs/
Full Compilation (includes kernel, modules, and device tree):
./nvbuild.sh
Partial Compilation Methods:
- Compile the kernel:
cd Linux_for_Tegra/source
./nvbuild.sh -o $PWD/kernel_output
- Compile Out-of-Tree Modules:
cd Linux_for_Tegra/source
make modules

# Install module drivers into rootfs
sudo -E make modules_install
- Compile the device tree:
cd Linux_for_Tegra/source
make dtbs
Updating the Kernel and Device Tree (Without Flashing)
- Check the
/boot/extlinux/extlinux.conffile to confirm the paths of the current IMAGE and DTB (see LINUX and FDT entries in the example below):
TIMEOUT 30
DEFAULT primary

MENU TITLE L4T boot options

LABEL primary
      MENU LABEL primary kernel
      LINUX /boot/Image
      FDT /boot/dtb/kernel_tegra234-NG45XX-p3768-0000+p3767-0003-nv-super.dtb
      INITRD /boot/initrd
      APPEND ${cbootargs} root=PARTUUID=756c2935-3ec5-487a-96c8-424f306ca235 rw rootwait rootfstype=ext4 mminit_loglevel=4 console=ttyTCU0,115200 firmware_class.path=/etc/firmware fbcon=map:0 nospectre_bhb video=efifb:off console=tty0
      OVERLAYS /boot/tegra234-p3767-camera-p3768-imx678-C.dtbo
- Back up the original kernel image:
sudo cp /boot/Image /boot/Image.backup
sudo cp /boot/dtb/kernel_tegra234-NG45XX-p3768-0000+p3767-0003-nv-super.dtb /boot/dtb/kernel_tegra234-NG45XX-p3768-0000+p3767-0003-nv-super.dtb.backup
- Use
scpto copy the newly compiled IMAGE and DTB to the paths above:
sudo cp $HOME/Image /boot/Image.backup
sudo cp $HOME/kernel_tegra234-NG45XX-p3768-0000+p3767-0003-nv-super.dtb /boot/dtb/kernel_tegra234-NG45XX-p3768-0000+p3767-0003-nv-super.dtb
2. Remote Debugging Methods
Prerequisites
Complete the AIBOX network configuration as follows:
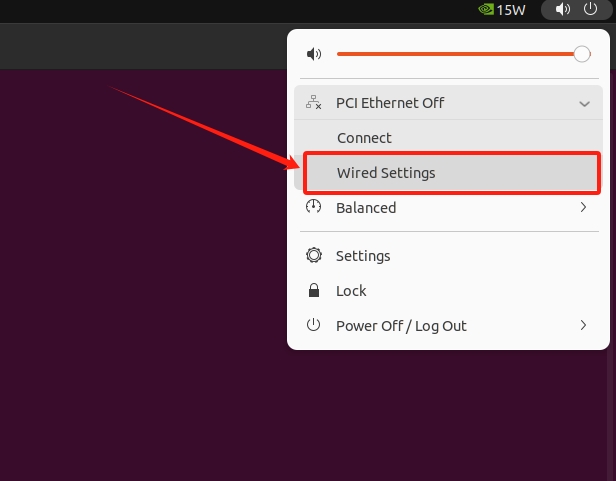
- Click the Ethernet icon in the top-right corner → Select "Wired Settings".
-
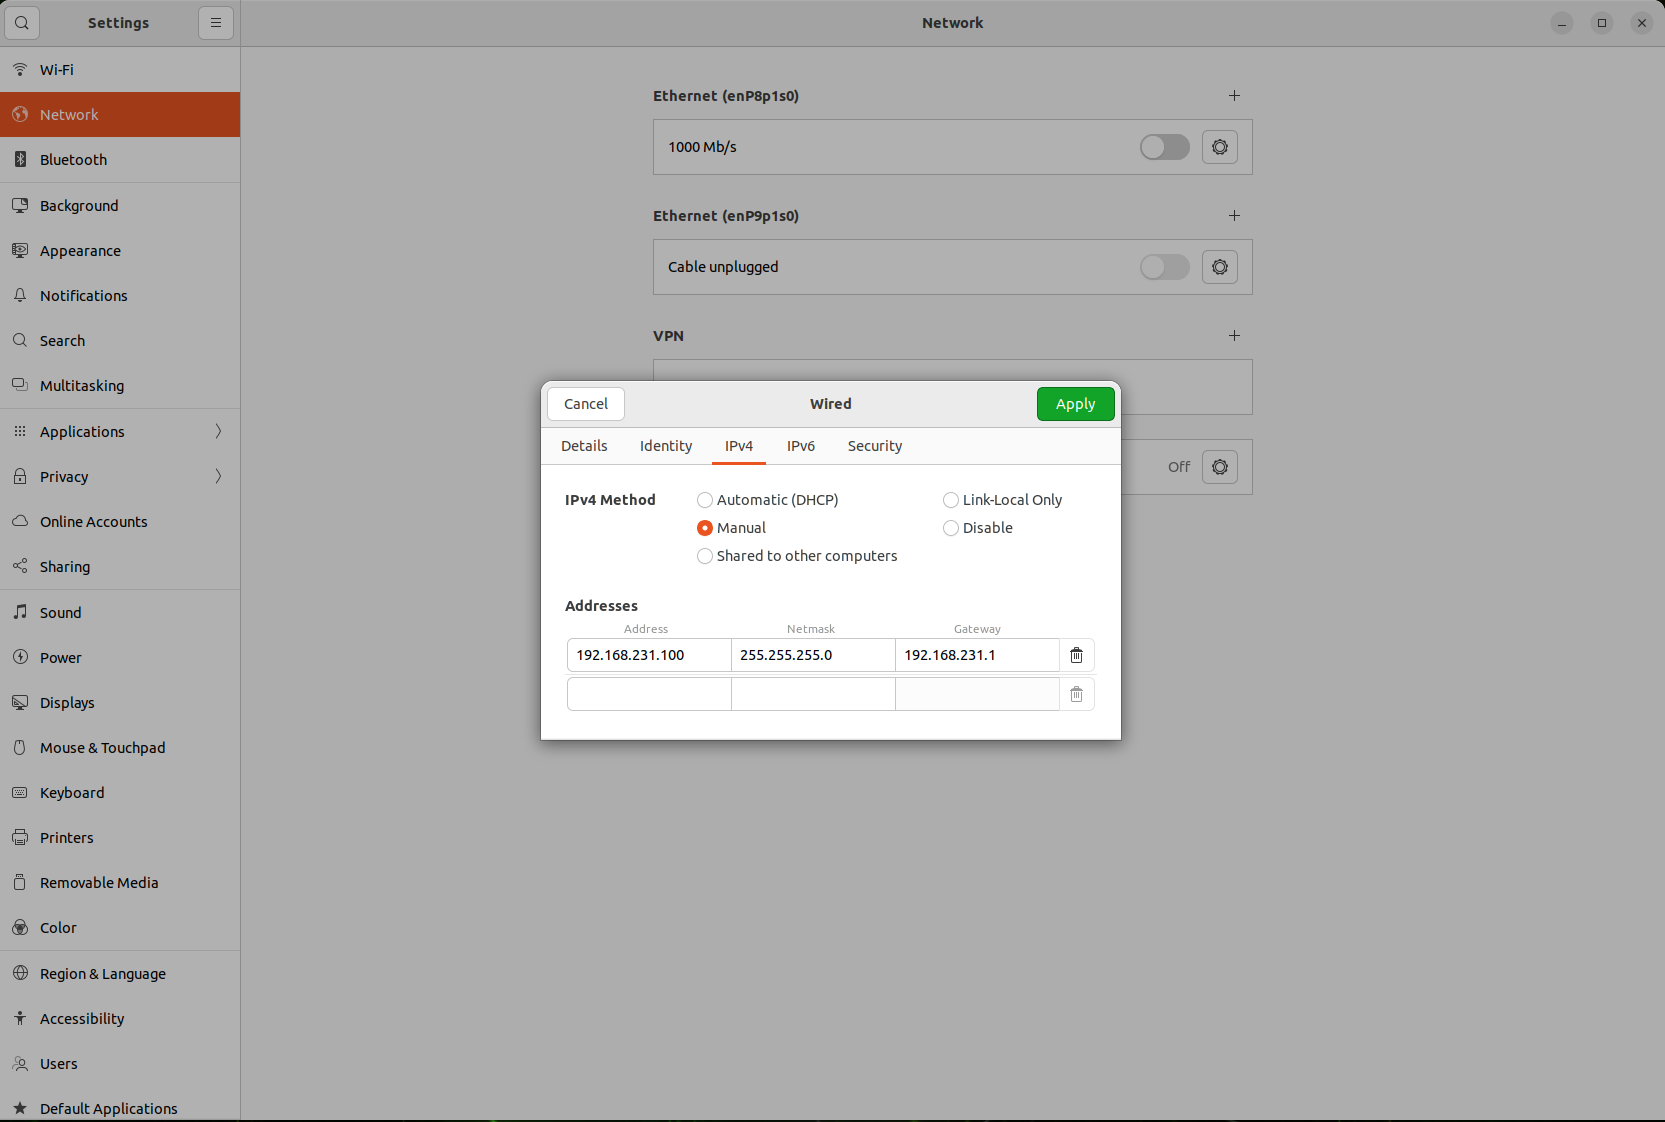
In the network settings window, select the current wired connection.
-
Click the
gearicon for detailed settings:-
Under the
IPv4tab, selectManualconfiguration. -
Enter the static IP address, subnet mask, and gateway. For example:
-
Address:
192.168.231.100 -
Netmask:
255.255.255.0 -
Gateway:
192.168.231.1
-
-
In the DNS section, enter DNS server addresses (e.g.,
8.8.8.8and8.8.4.4). -
Click
Applyto save the settings.
-
- Restart the network to apply the new settings.
Network Verification
- Open a terminal and verify connectivity with:
SSH Access
-
On a Windows PC, press
Win + Rto open the "Run" dialog. -
Enter
powershelland press Enter. -
Connect to the AIBOX via SSH:
# Connect to AIBOX
ssh username@aibox-ip
# Execute remote commands
ssh username@aibox-ip "uname -a"
RDP Remote Desktop Access
- Start the JETSON terminal and install the following:
sudo apt update
sudo apt-get install tightvncserver xrdp
sudo systemctl enable xrdp
sudo systemctl start xrdp
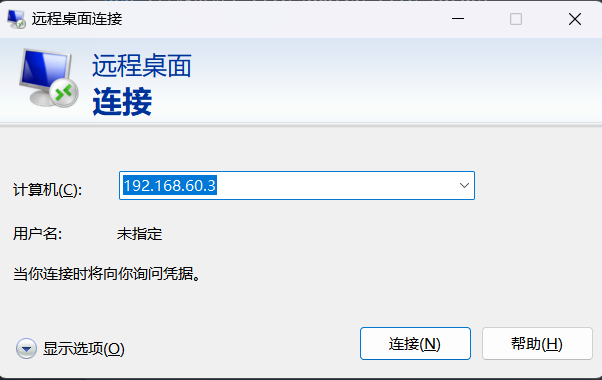
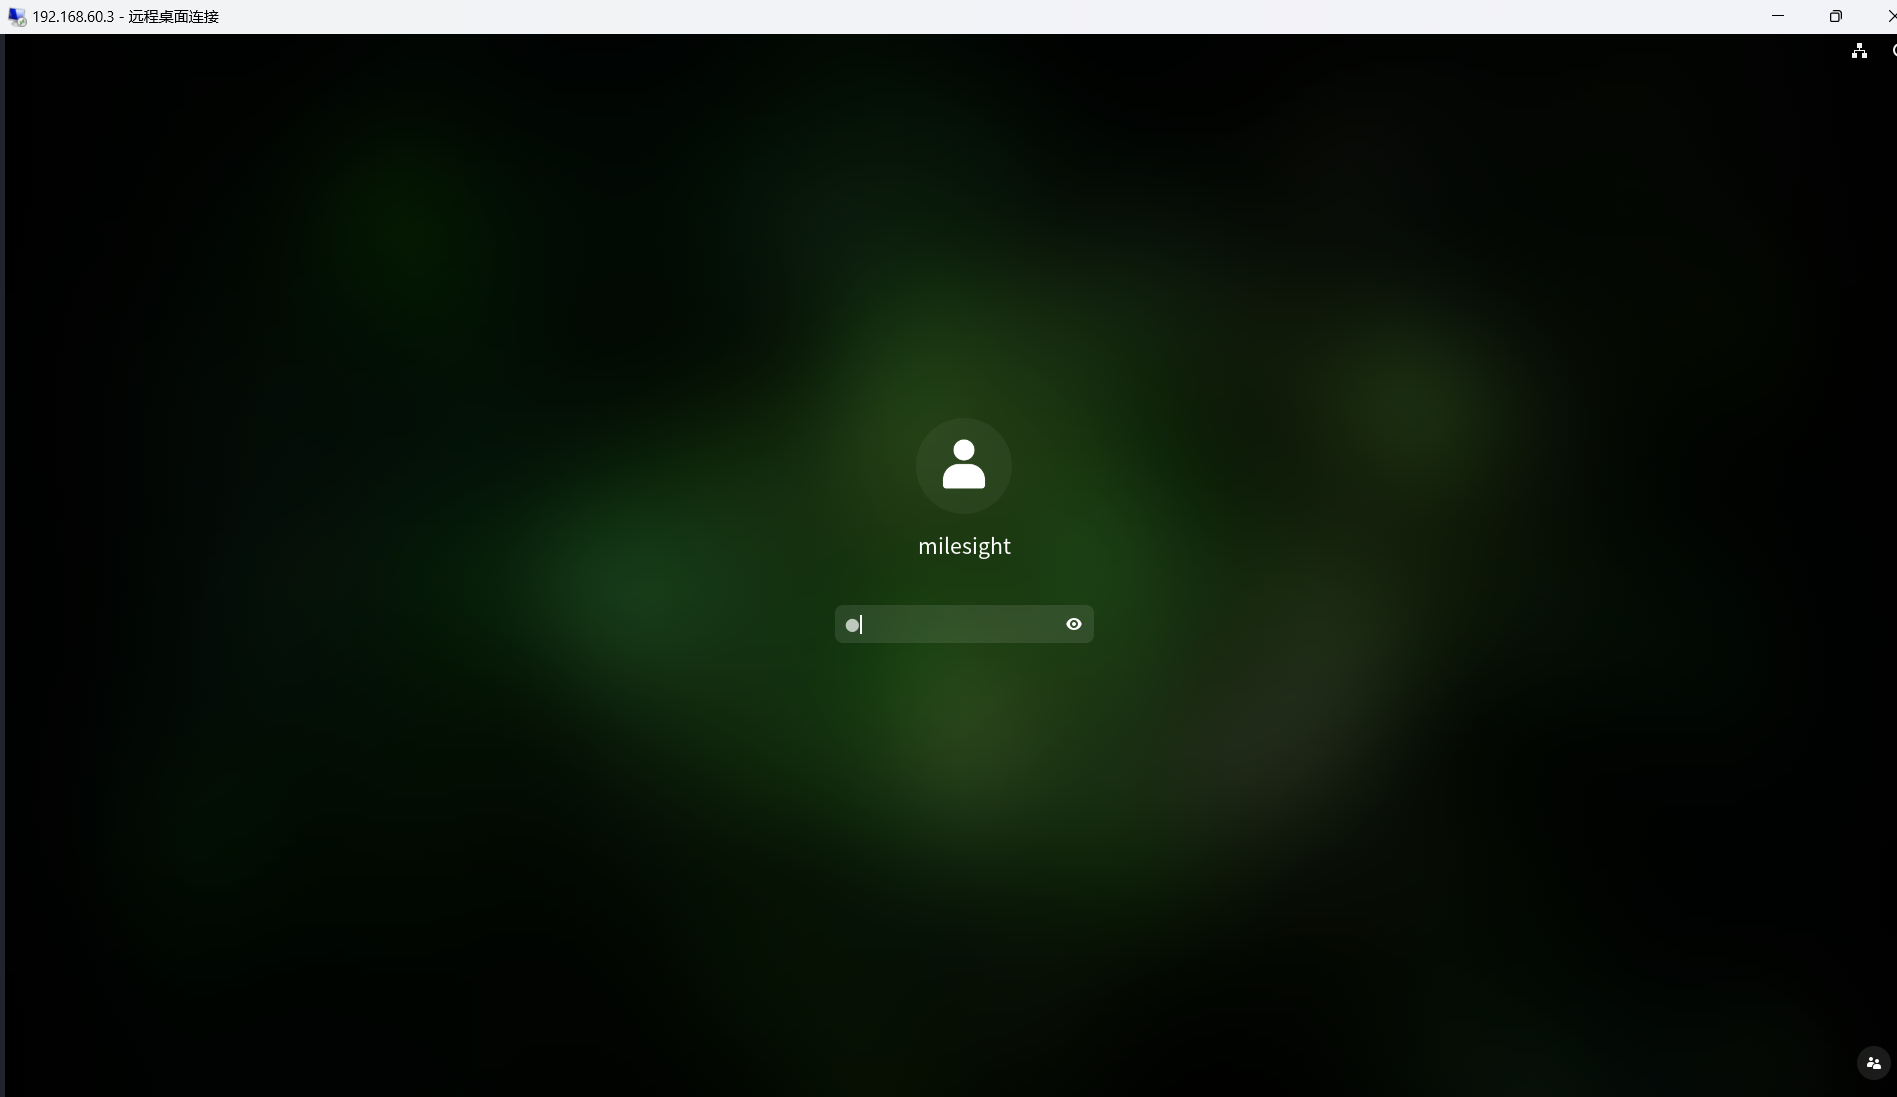
- Then, on Windows, start "Remote Desktop Connection" and enter the IP address of the JETSON.
-
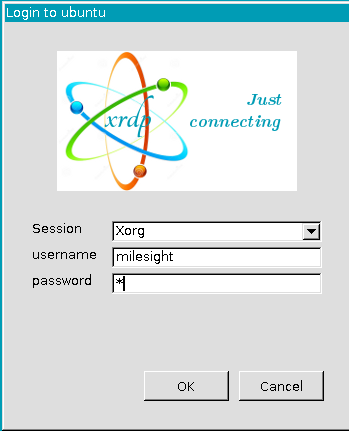
Click "Connect" and enter the username and password.
-
If you see the screen below, it indicates a successful connection.
References
Kernel Customization — NVIDIA Jetson Linux Developer Guide 1 documentation