Quick Start
Overview
This tutorial will introduce the operation of NE101 event-triggered camera, including the basic use of the camera, camera configuration, and camera installation.
Product Preparation
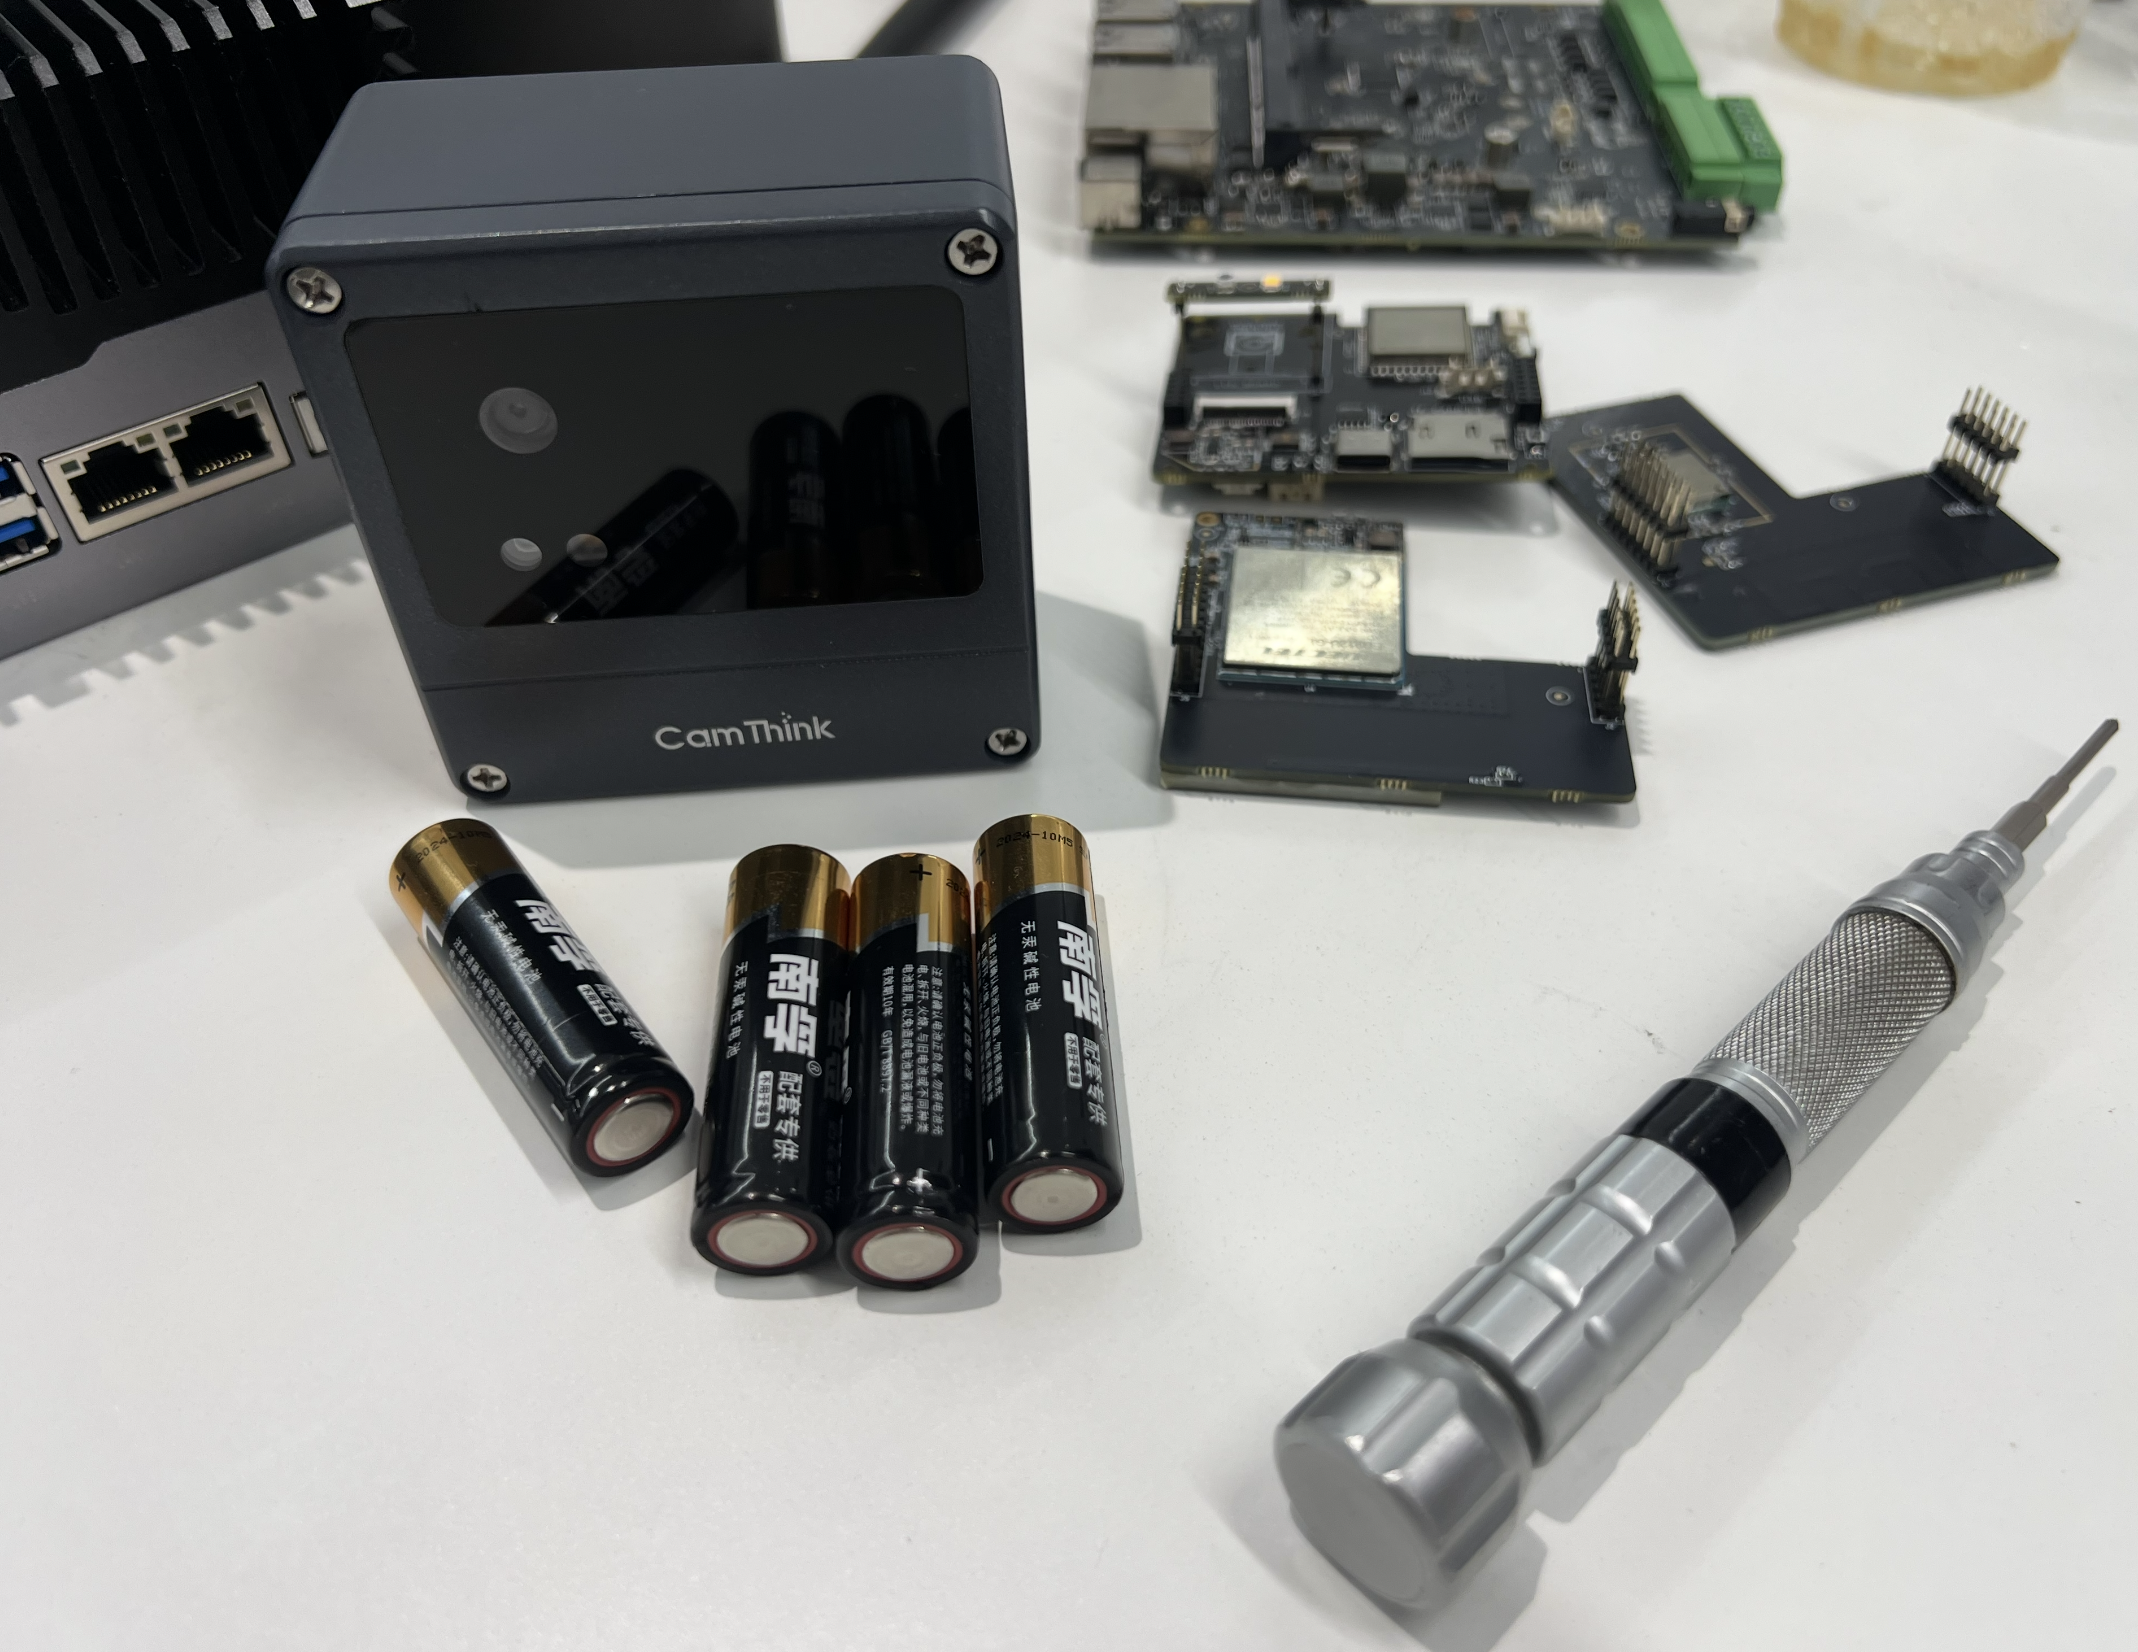
Before starting, please prepare one NE101 camera, four AA batteries, one Phillips screwdriver, and NE101 camera related optional accessories, such as Cat.1 communication module, Wi-Fi Halow communication module. If you do not have NE101 camera yet, you can buy it through our estore, please click「NE101 Purchase Address」.
Product Set Up
Power On the Camera
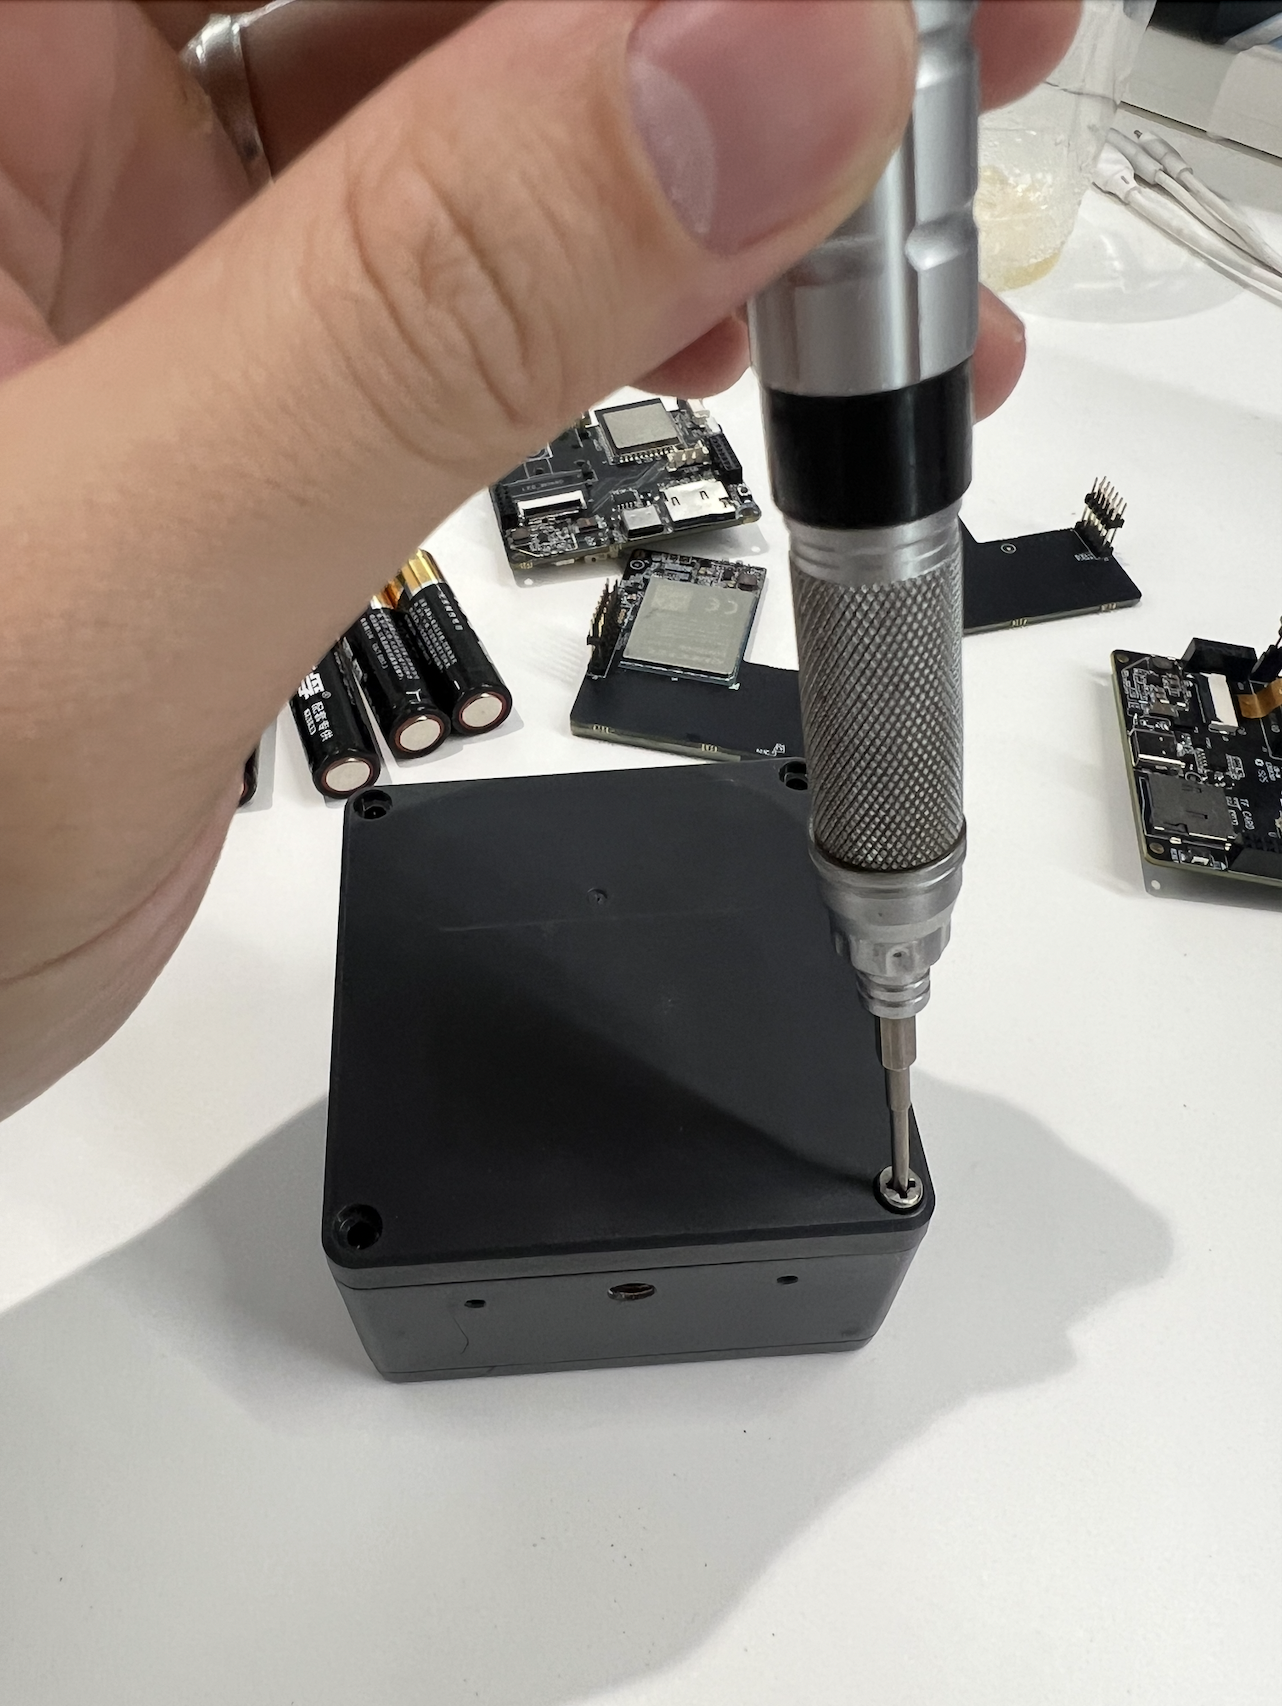
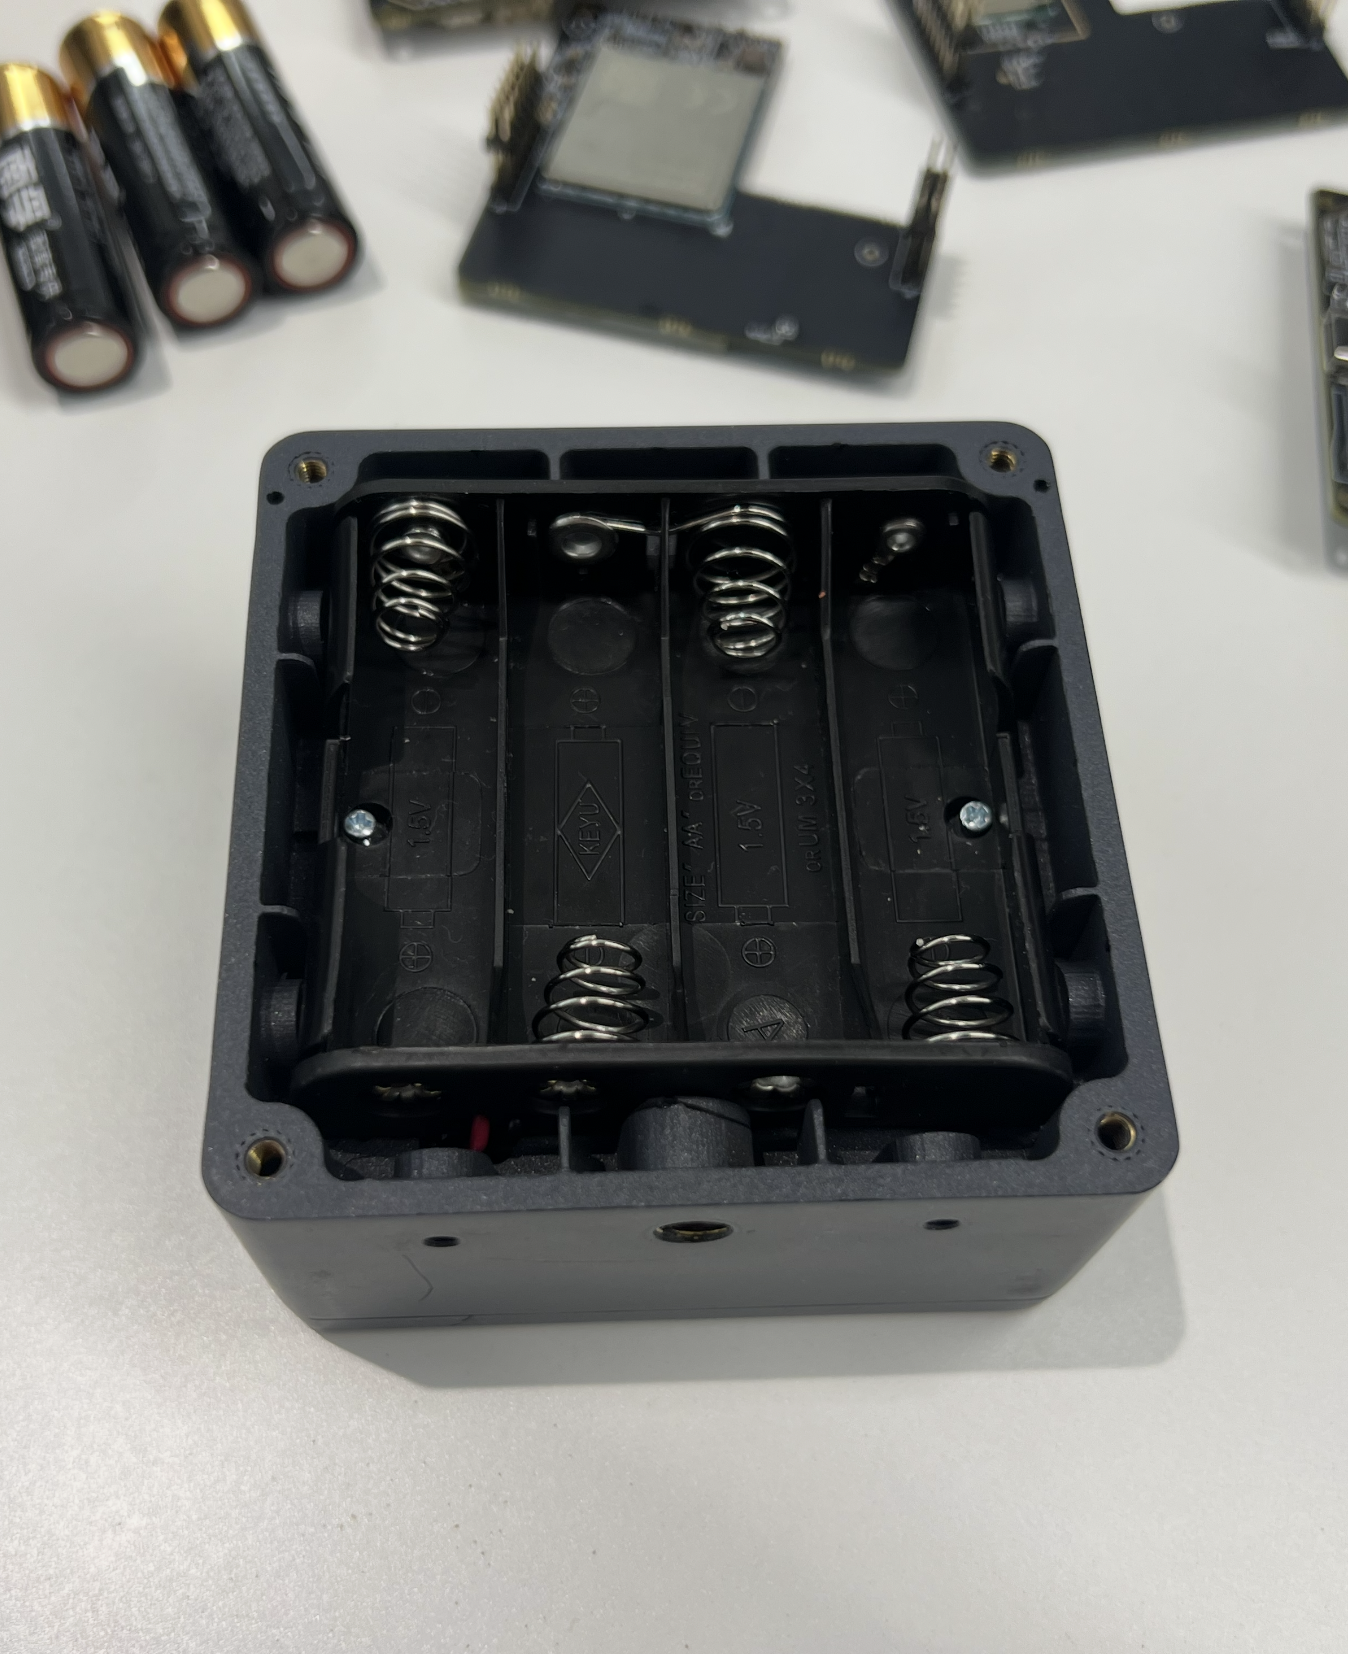
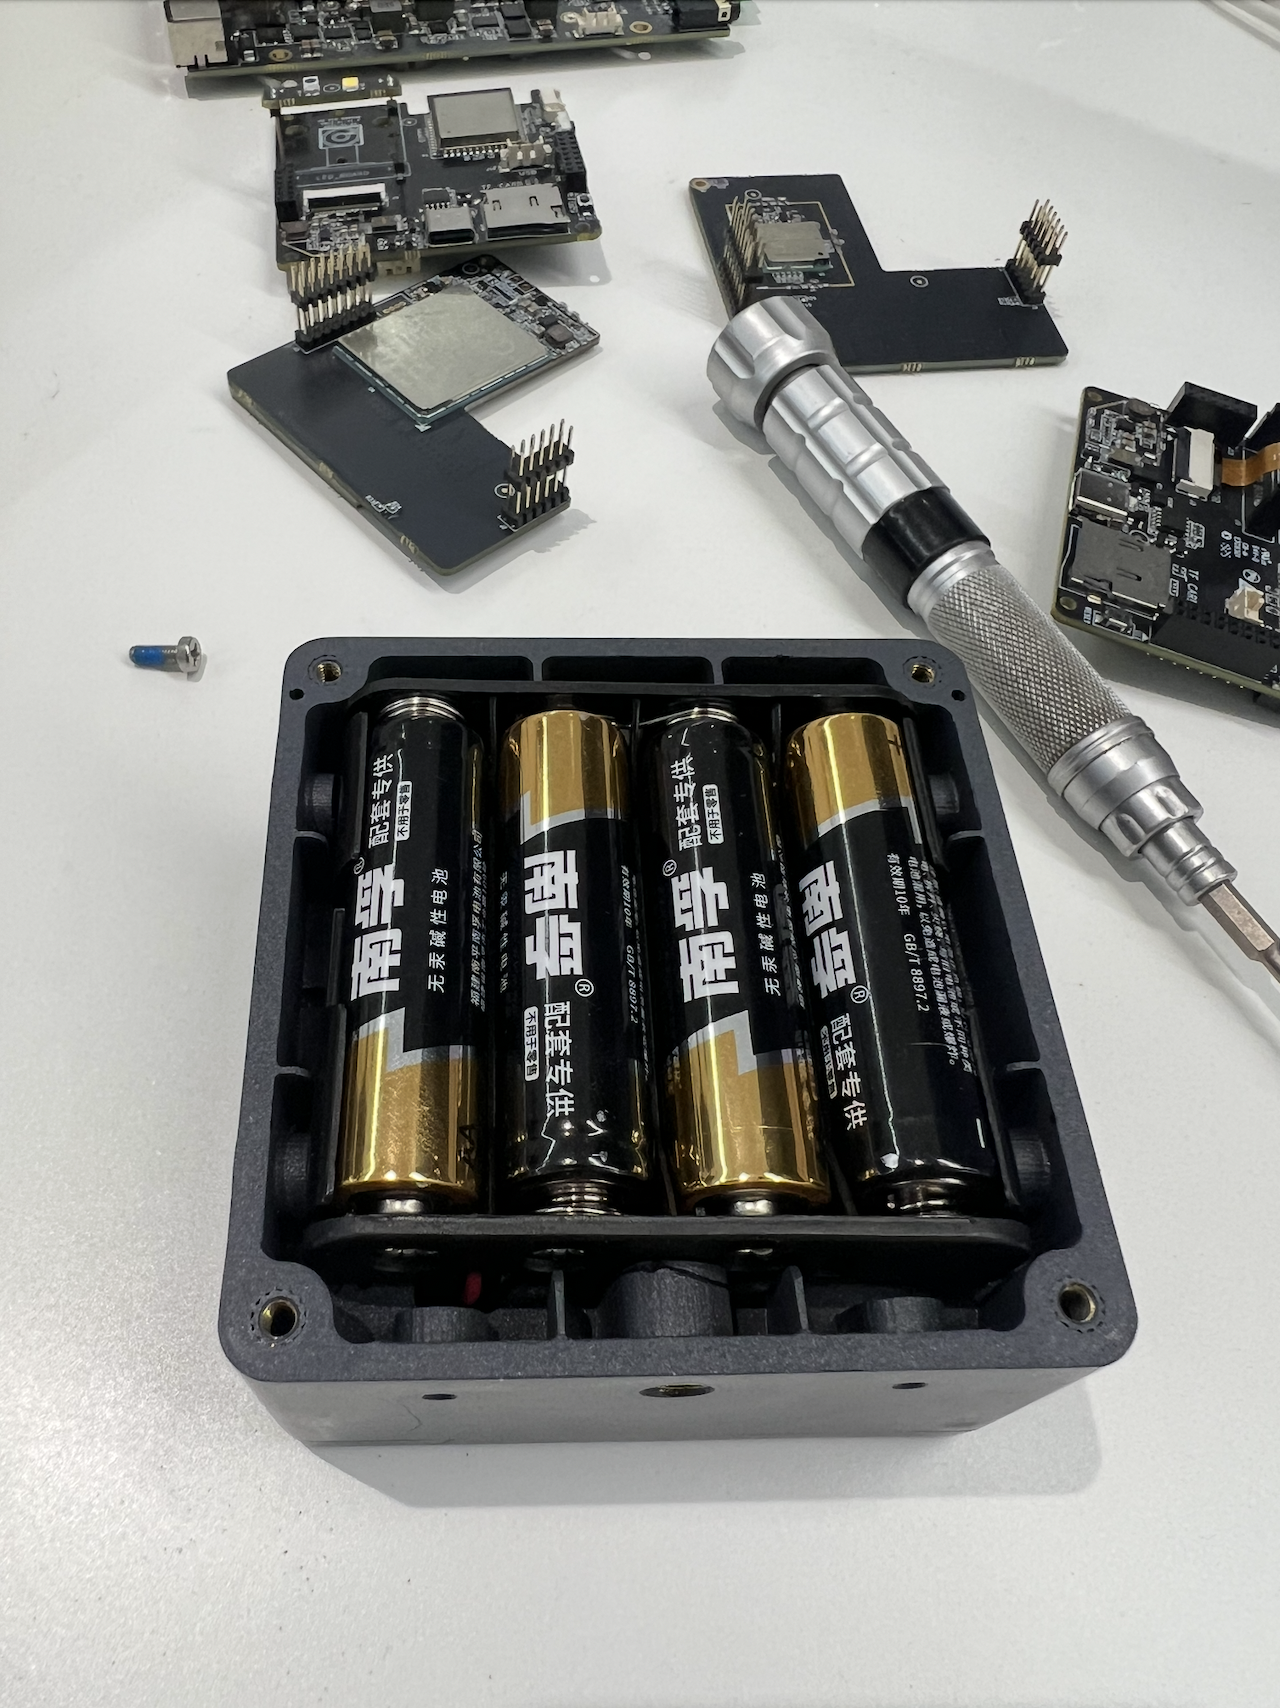
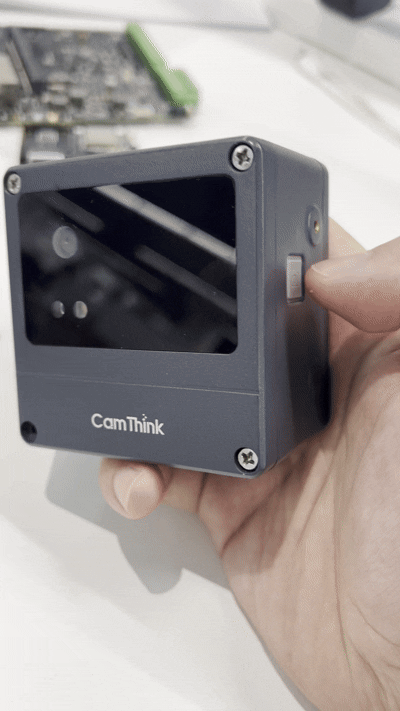
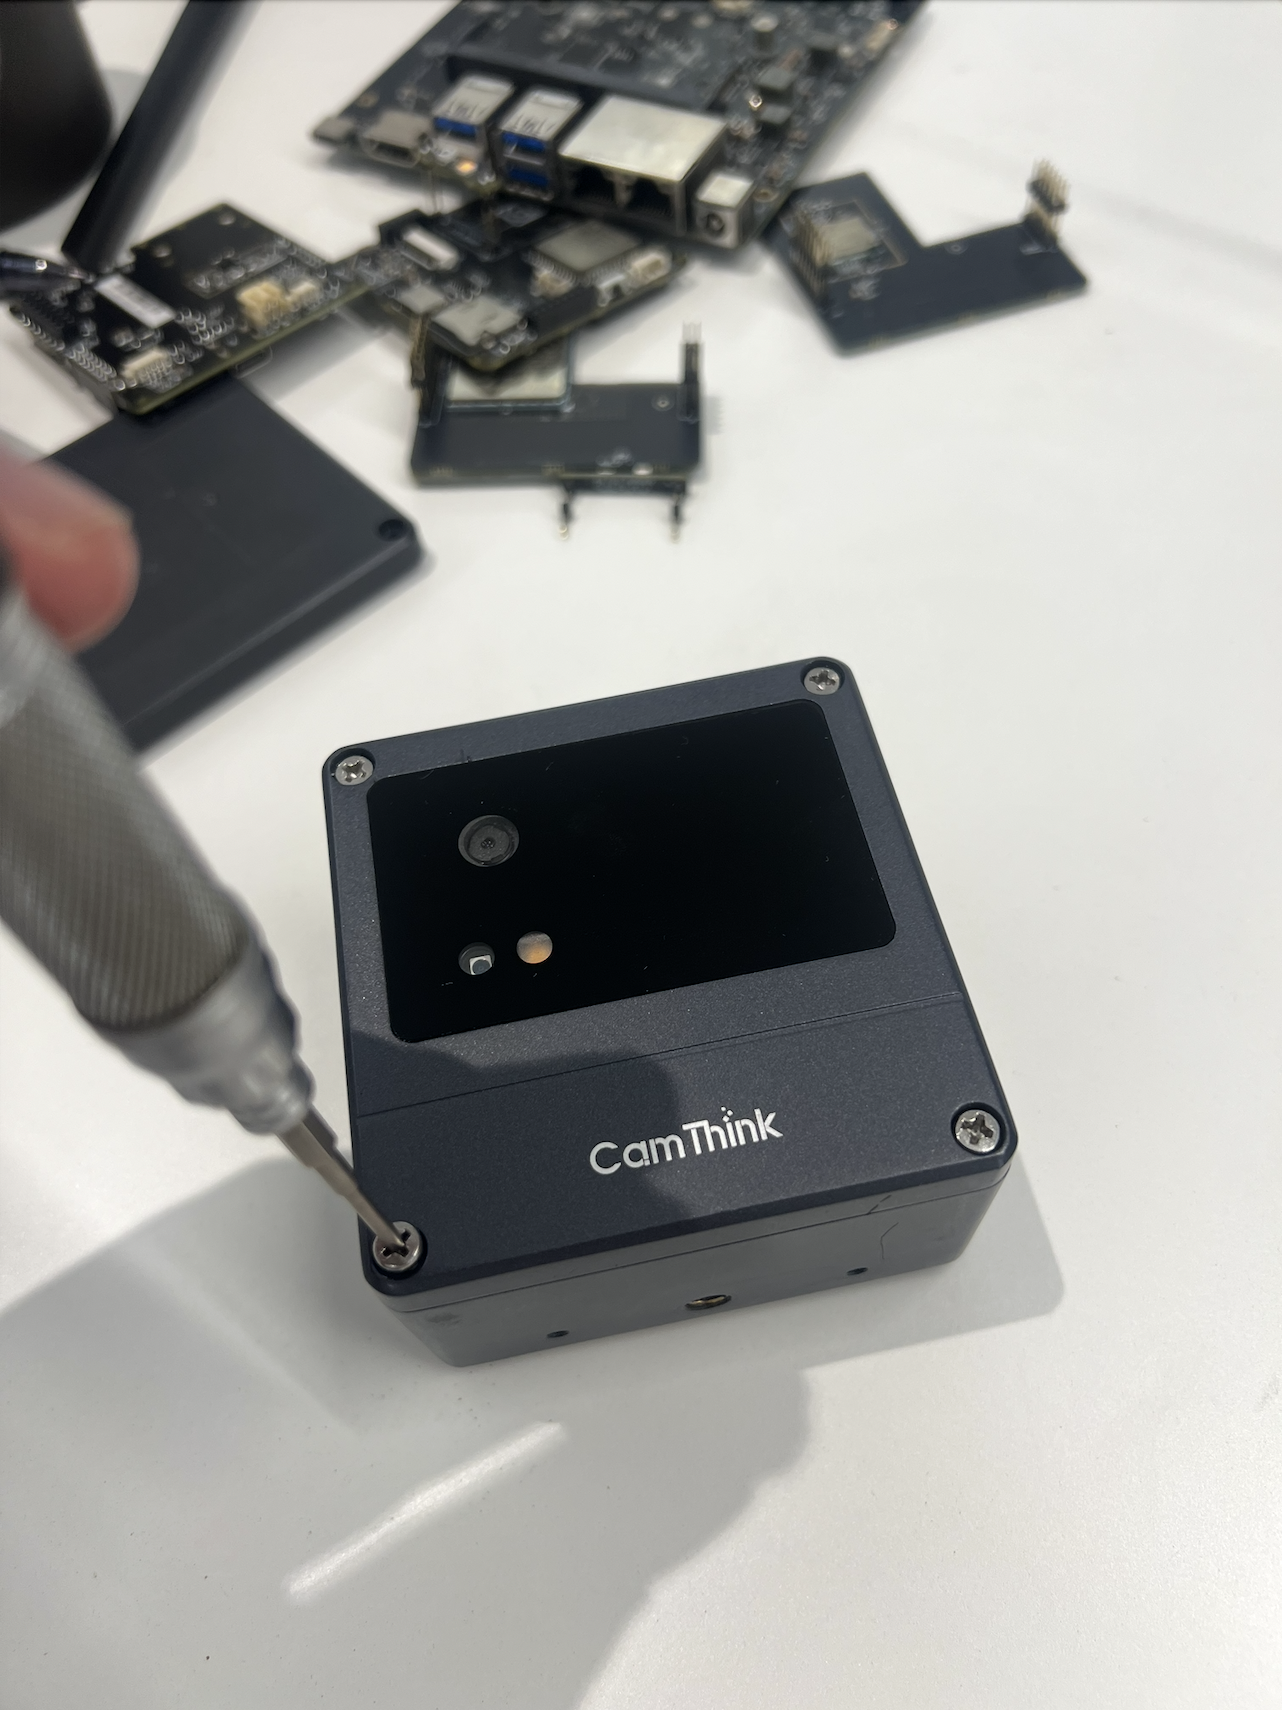
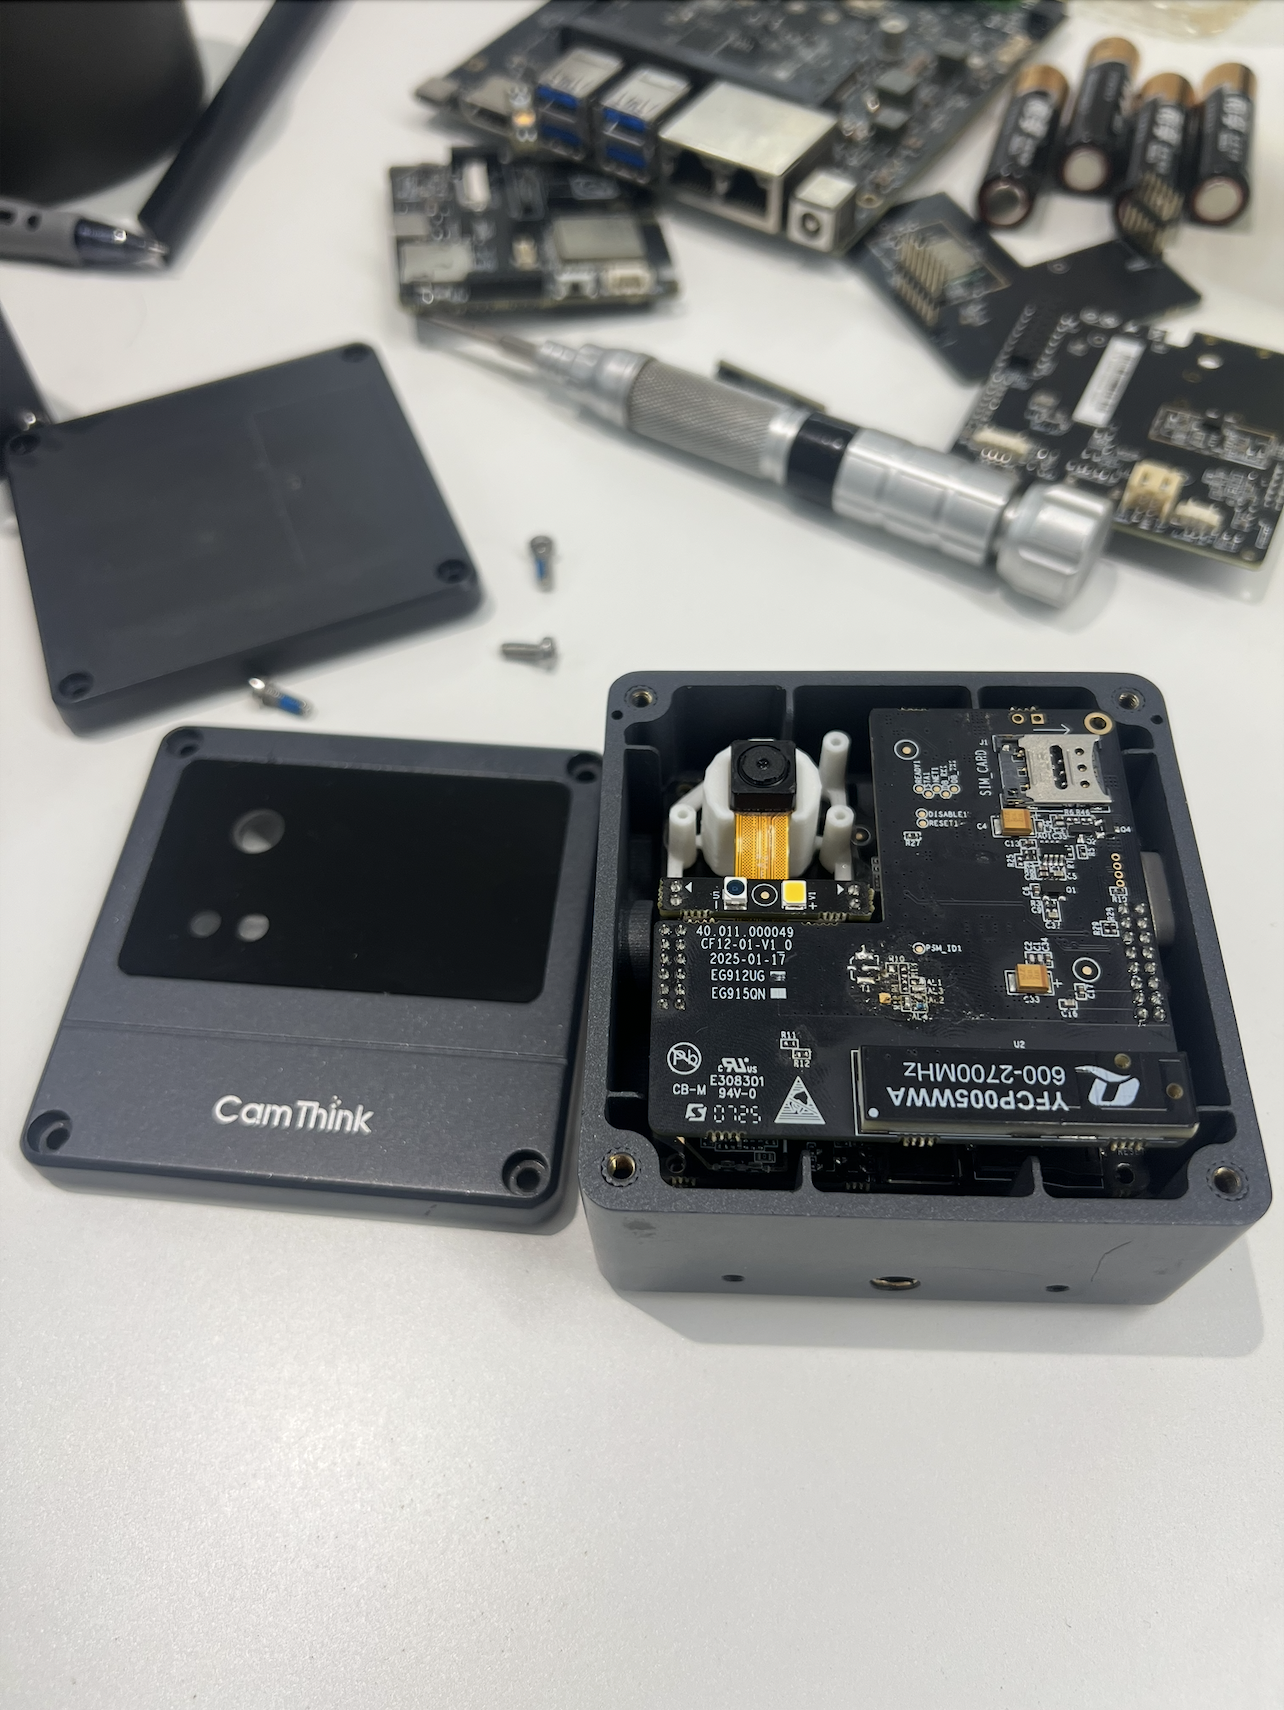
Use a screwdriver to remove the back cover of the NE101, install the batteries according to the distribution of the battery compartment, wait until the light on the front of the camera flashes and lights up, indicating that the camera has system booted, then reinstall the back cover back to the device. At this point you have completed the basic startup of the device. After completion, we can proceed to the next step to configure the device.
Camera Configuration
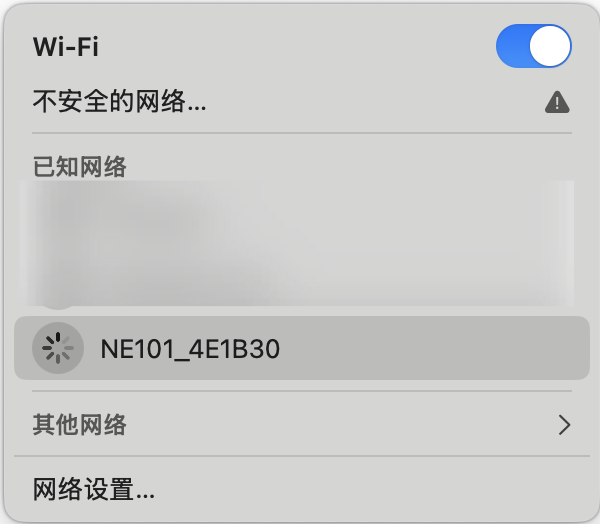
For camera configuration, the built-in Wi-Fi AP of NE101 provides a configuration Web for users to modify the parameters and functions of the camera. The SSID naming rule of the Wi-Fi AP is NE101_ABC123. Please ensure that you have a mobile phone or computer nearby to connect to the Wi-Fi AP provided by NE101 to access the Web page for configuration modifications. If the connection is successful, the Wi-Fi AP can access the configuration Web page through 192.168.1.1. The relevant steps will be explained in detail below.
1. Ensure NE101 Remains Powered On
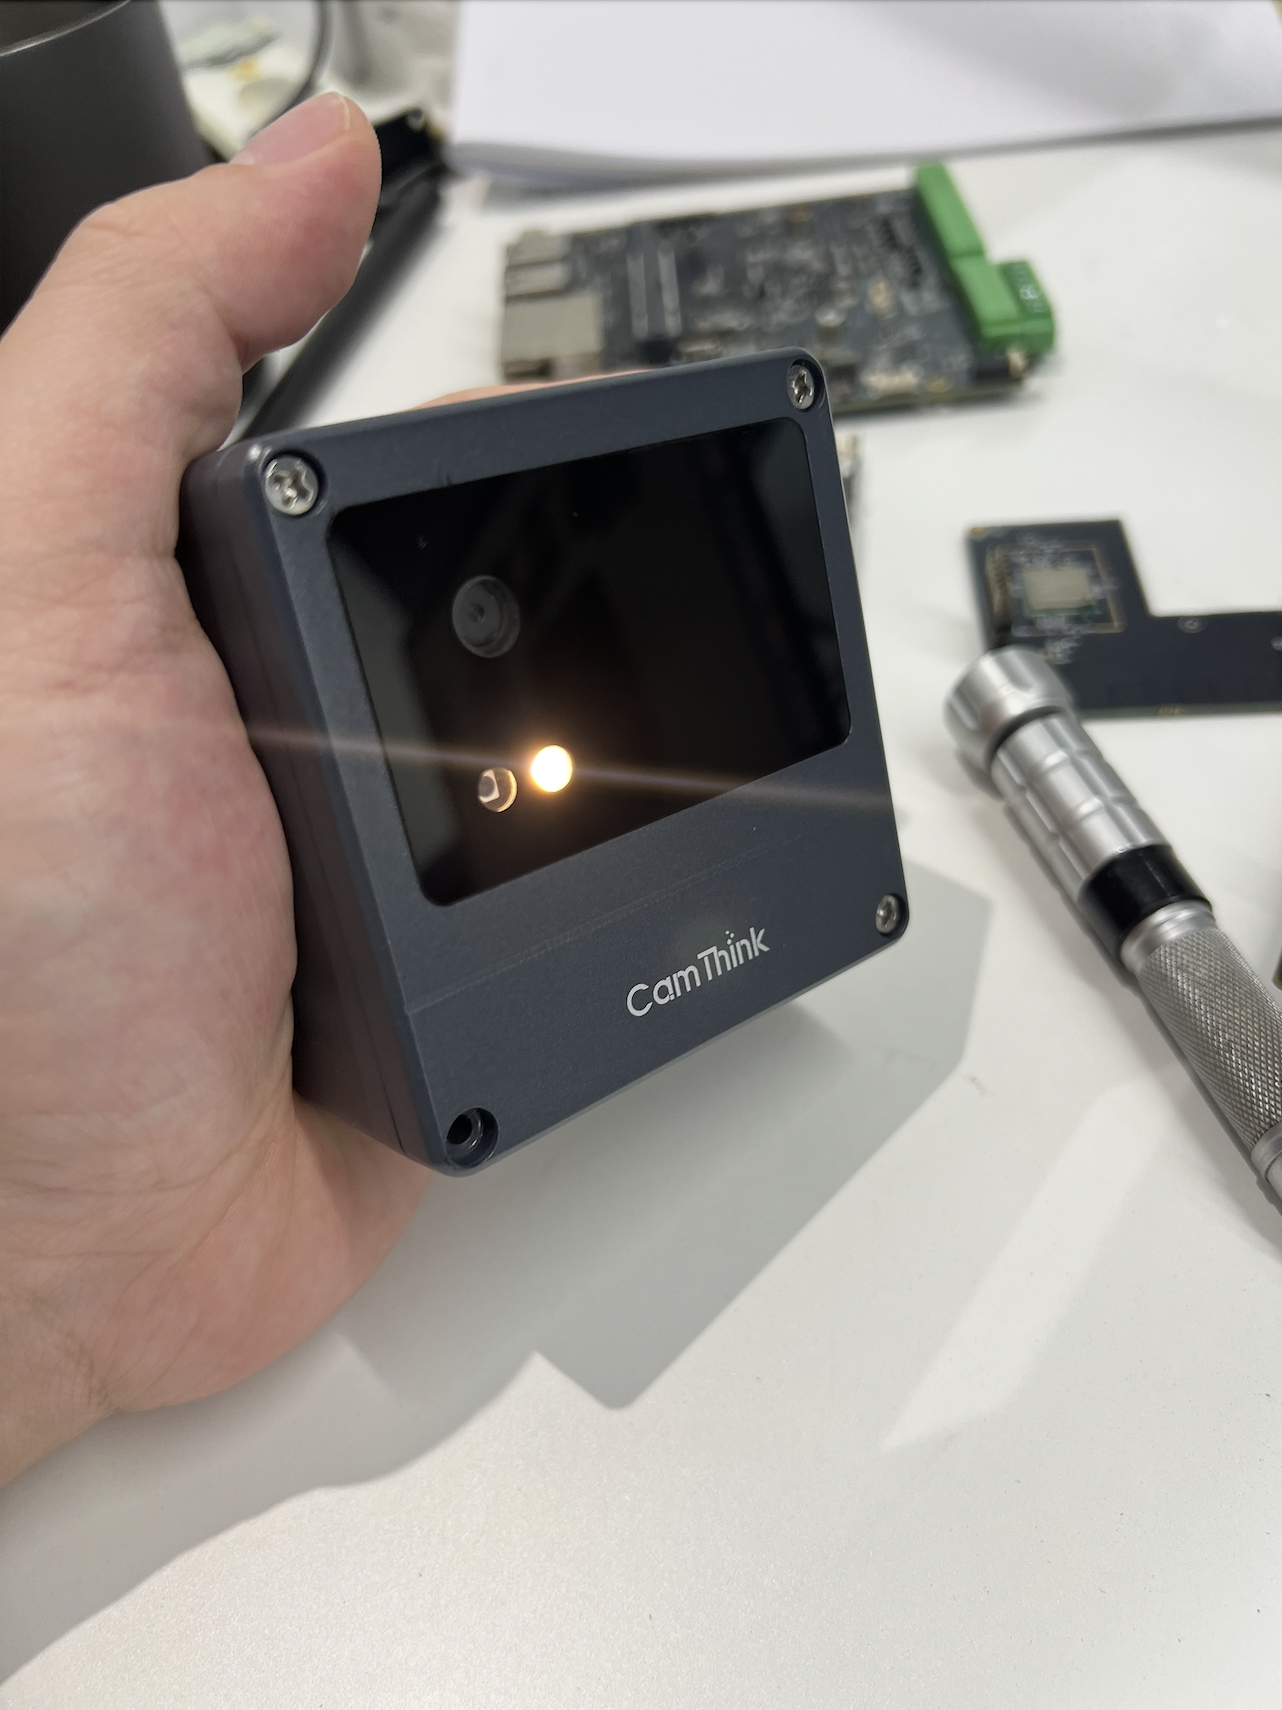
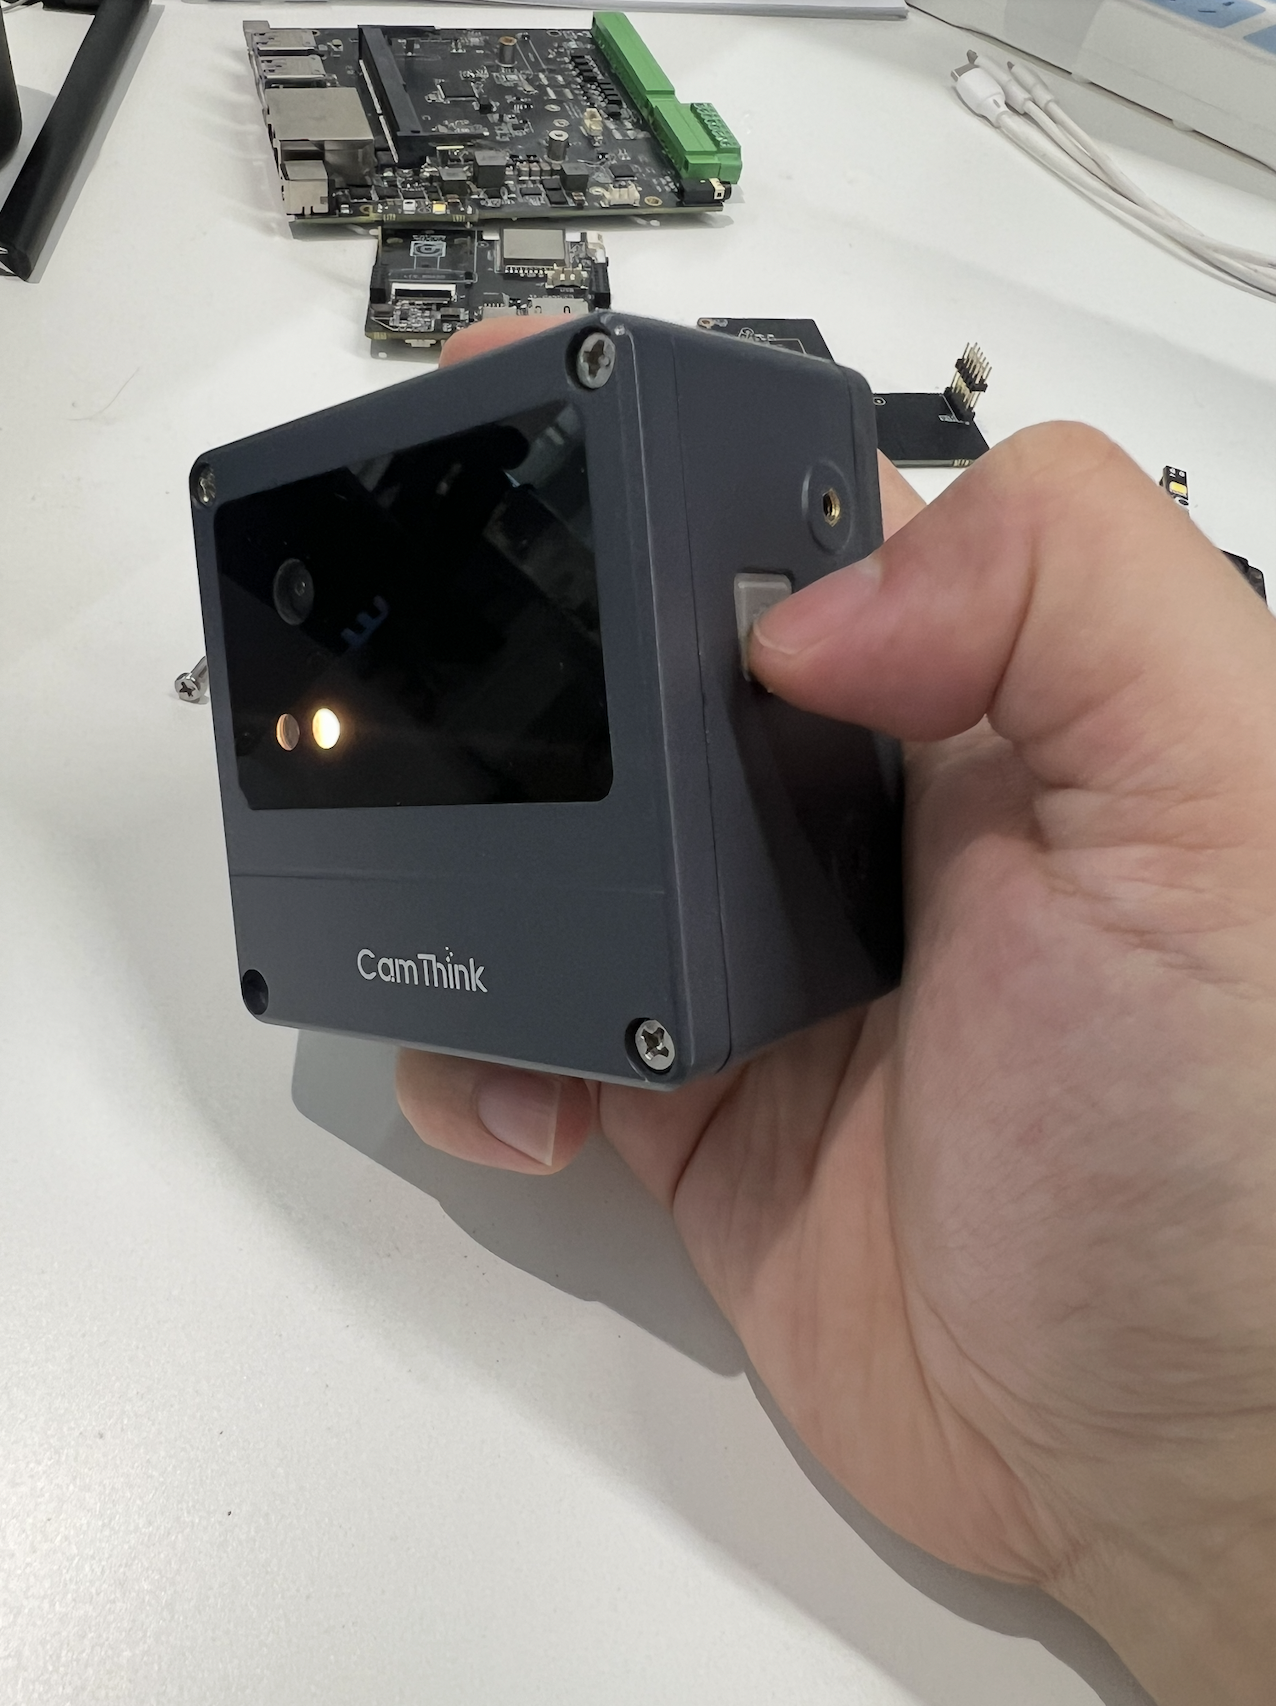
You can press the photo button on the right side of the camera lightly to see if the flash is on. If it is on, it means that the camera is on. If you are debugging the device, press the photo button, and NE101 will capture the image of the current page and upload the image through the MQTT address you configured. If everything is function normally, please see the instructions below for detailed configuration modifications.
2. Turn on the NE101 Wi-Fi AP and Connect to It on A Phone or Computer
After the NE101 system starts normally, you can look for the Wi-Fi AP with the corresponding SSID named NE101_ABC123, then connect it on your computer or mobile phone without requesting a password. When you connect normally, you can access the NE101 configuration Web page in the browser through the 192.168.1.1 address. If you succeed, you will see the Web page on the browser.
In the latest firmware version, the Wi-Fi AP wake-up logic has been optimized. Previously, the AP was enabled by long-pressing the shutter button for 3–5 seconds, during which the indicator light would flash twice. This has now been changed to a single press of the shutter button to enable the AP (a photo is taken simultaneously, and the light flashes once).Once enabled, if there is no operation within one minute or no activity on the web interface after connecting to the AP, the device will enter sleep mode. Pressing the shutter button again during this period will reset the sleep timer.
3. Configure the NE101 Camera
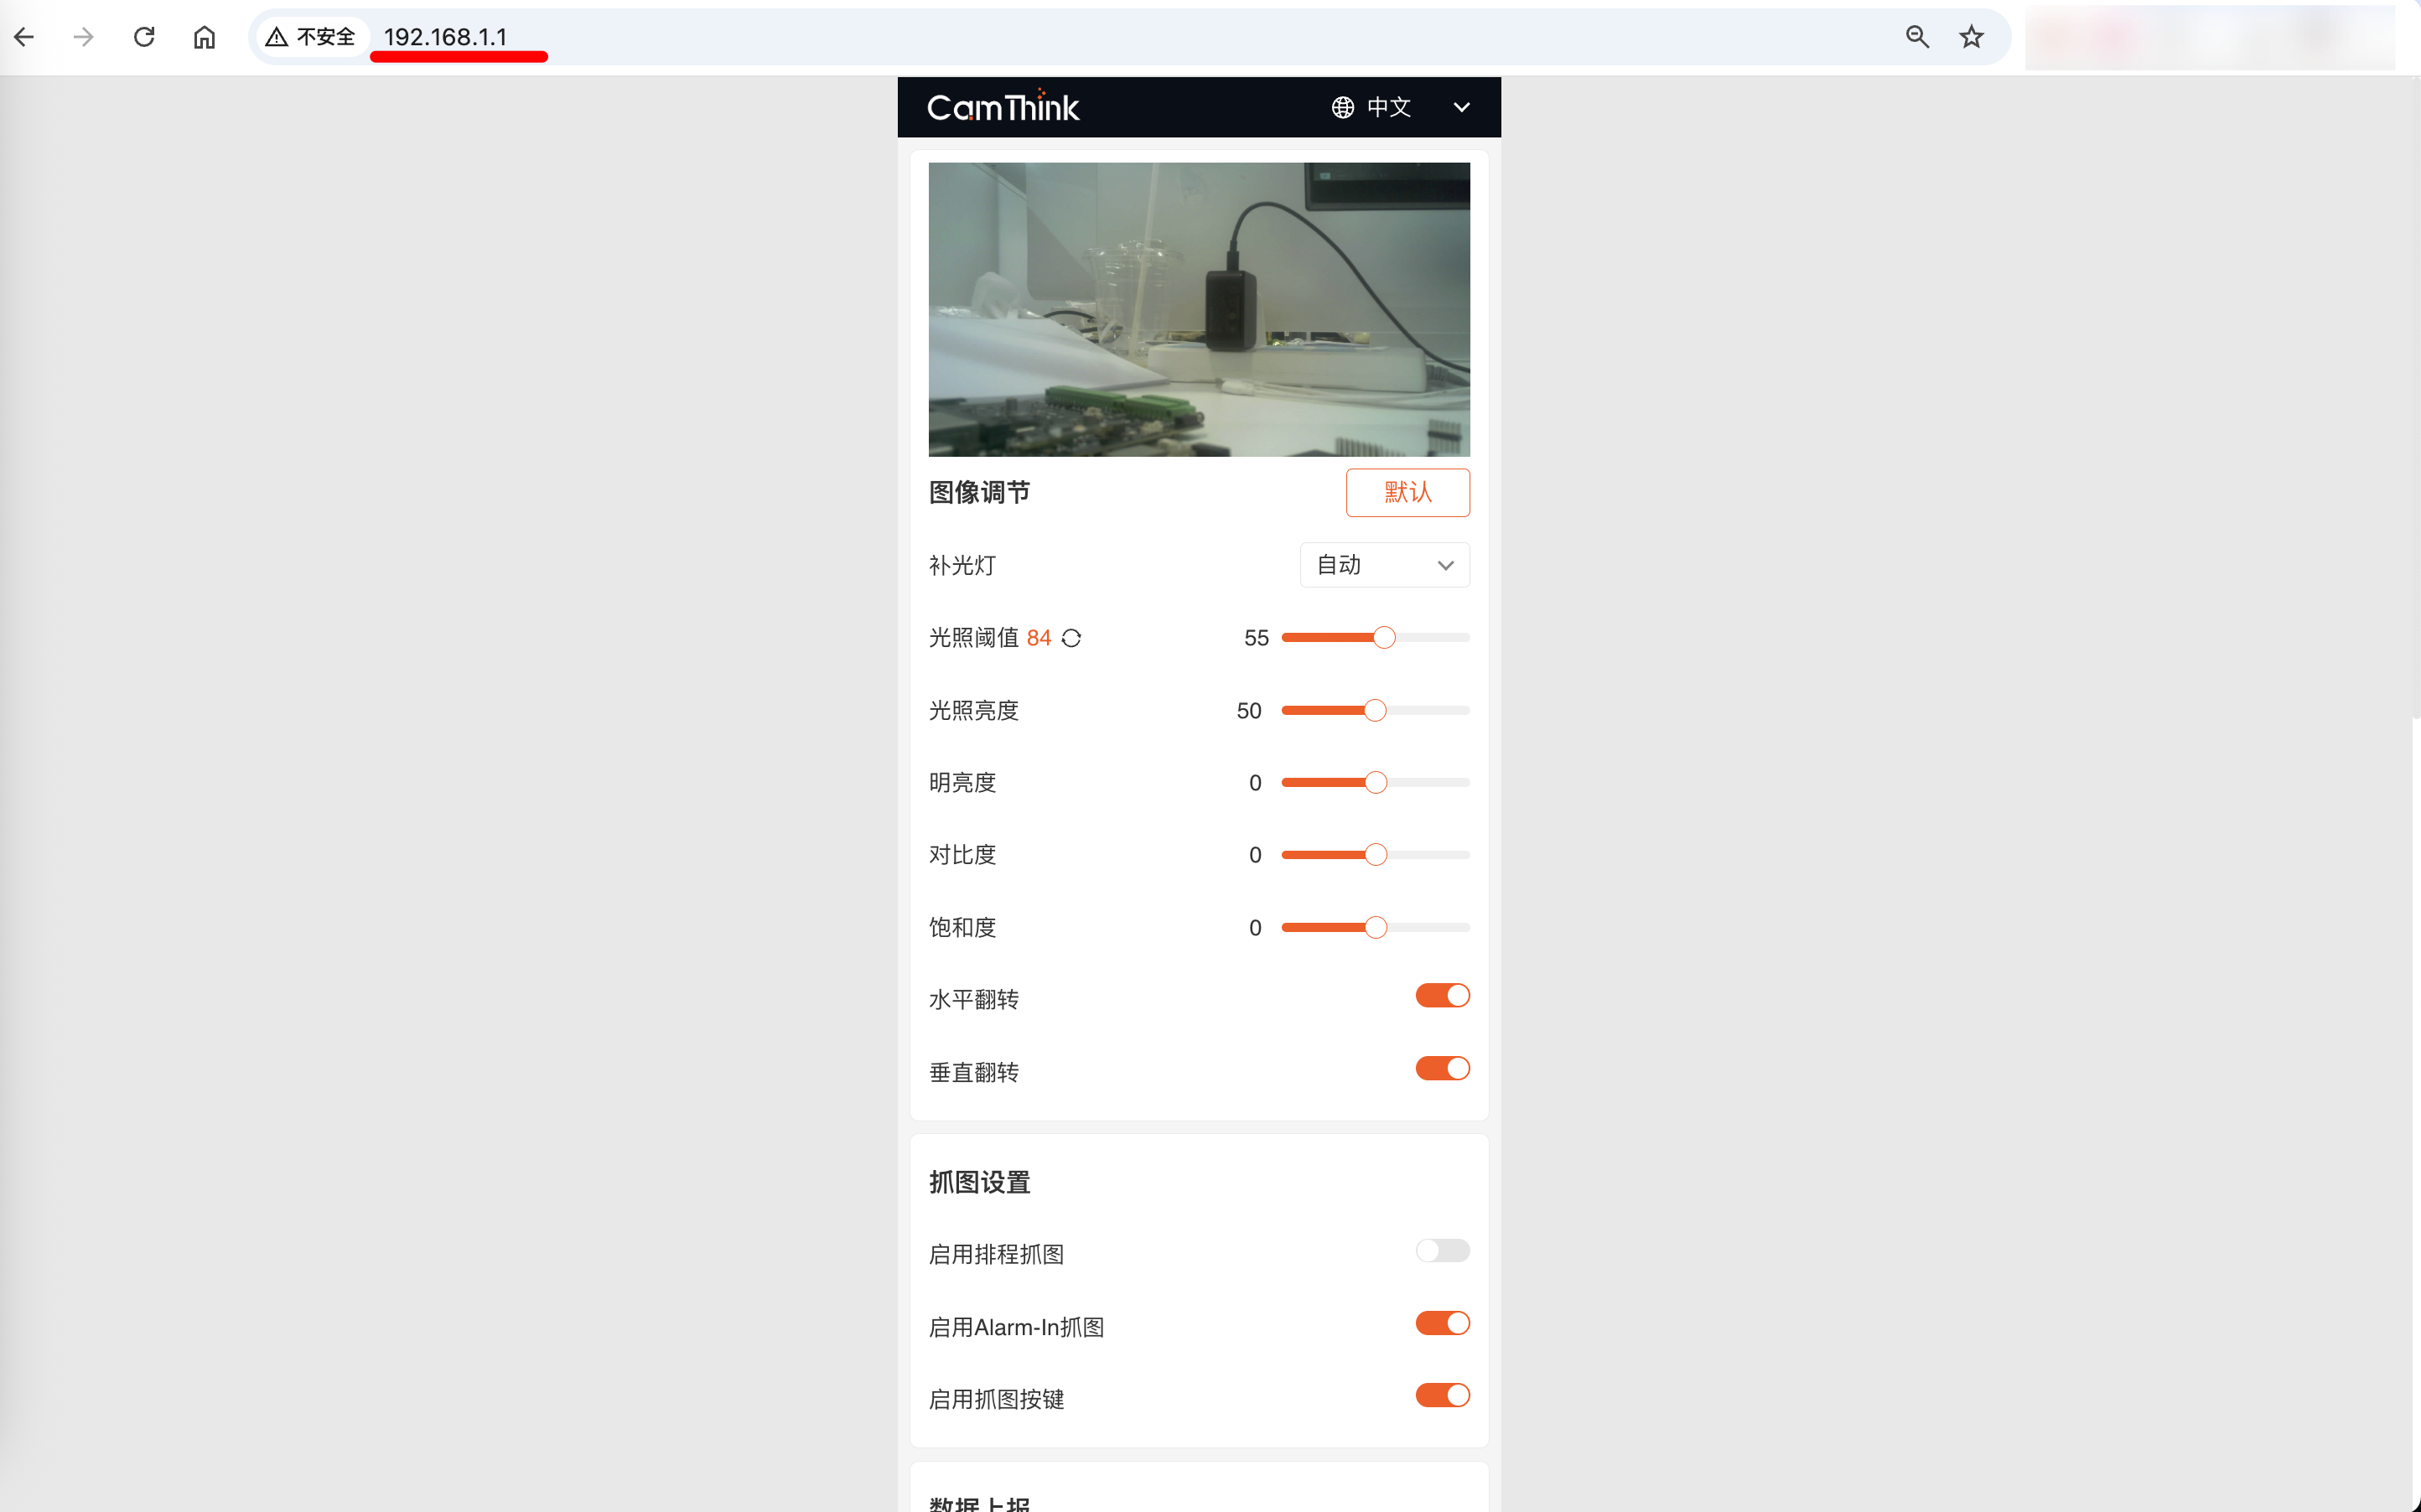
If you enter the device configuration page, let's take a look at how to modify the configuration. We will introduce by configuration category and main functions.
Image Settings
If you are using the OV5640 camera module, you can adjust the image settings of the device according to actual scenario requirements. All content is configurable, The USB camera module only supports fill light settings
- Default button: Clicking it then will reset the parameters of the OV5640 camera module to factory settings, please use with caution.
- Fill light mode: Supports 4 modes, for example, automatic mode, customization, always on and always off. Please set this configuration according to your actual usage scenario.
- Automatic mode
- Selecting automatic mode requires the additional setting of "Lighting Threshold". The data on the right is the current "Lighting Threshold" value. You can refresh the data through the button to the right of the value. You can set the threshold by adjusting it. The function of the threshold is to automatically turn on the camera's fill light when the light intensity is lower than the set value.
- The light intensity is the fill light intensity, which can be adjusted from 1 to 100.
- Customization mode
- Supports setting the time range, which refers to the time interval to enable the fill light during operation. This mode is usually used to schedule the fill light periodically to ensure image quality.
- The light intensity is the fill light intensity, which can be adjusted from 1 to 100.
- Always on mode
- The fill light is always on. The fill light is on at any time. It does not support setting the light intensity.
- Always off mode
- The fill light is always off and is not turned on at any time.
- Automatic mode
- Image adjustment function
- Brightness: 0-2 adjustable
- Contrast: 0-2 adjustable
- Saturation: 0-2 adjustable
- Horizontal flip: The picture is flipped horizontally, used when the imaging needs to be flipped horizontally after the device is actually installed.
- Vertical flip: flip the picture vertically, used when the imaging needs to be flipped vertically after the device is actually installed.
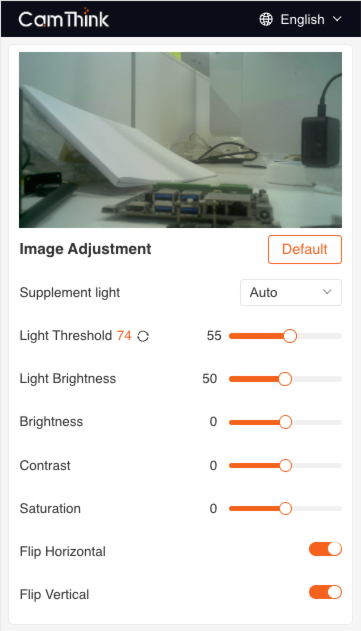
Image Capture Settings
Used to set the image capture function of the NE101 camera. Users can connect to the PIR sensor or other hardware to set the trigger of image capture.
- Periodically capture mode: After enabling the function, users can set the camera to capture images periodically and other relevant functions.
- Scheduled capture mode: It supports scheduled image captures every day at a specific time from Monday to Sunday. The time can be set from 00:00 to 23:59, allowing a maximum of 8 scheduled times.
- Interval capture mode: It supports setting the time interval for image capture, which is used to capture images according to time intervals by minutes, hours, and days. It can only support one rule.
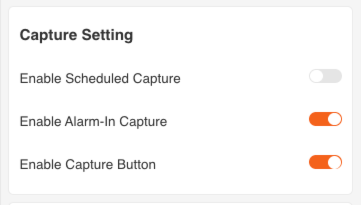
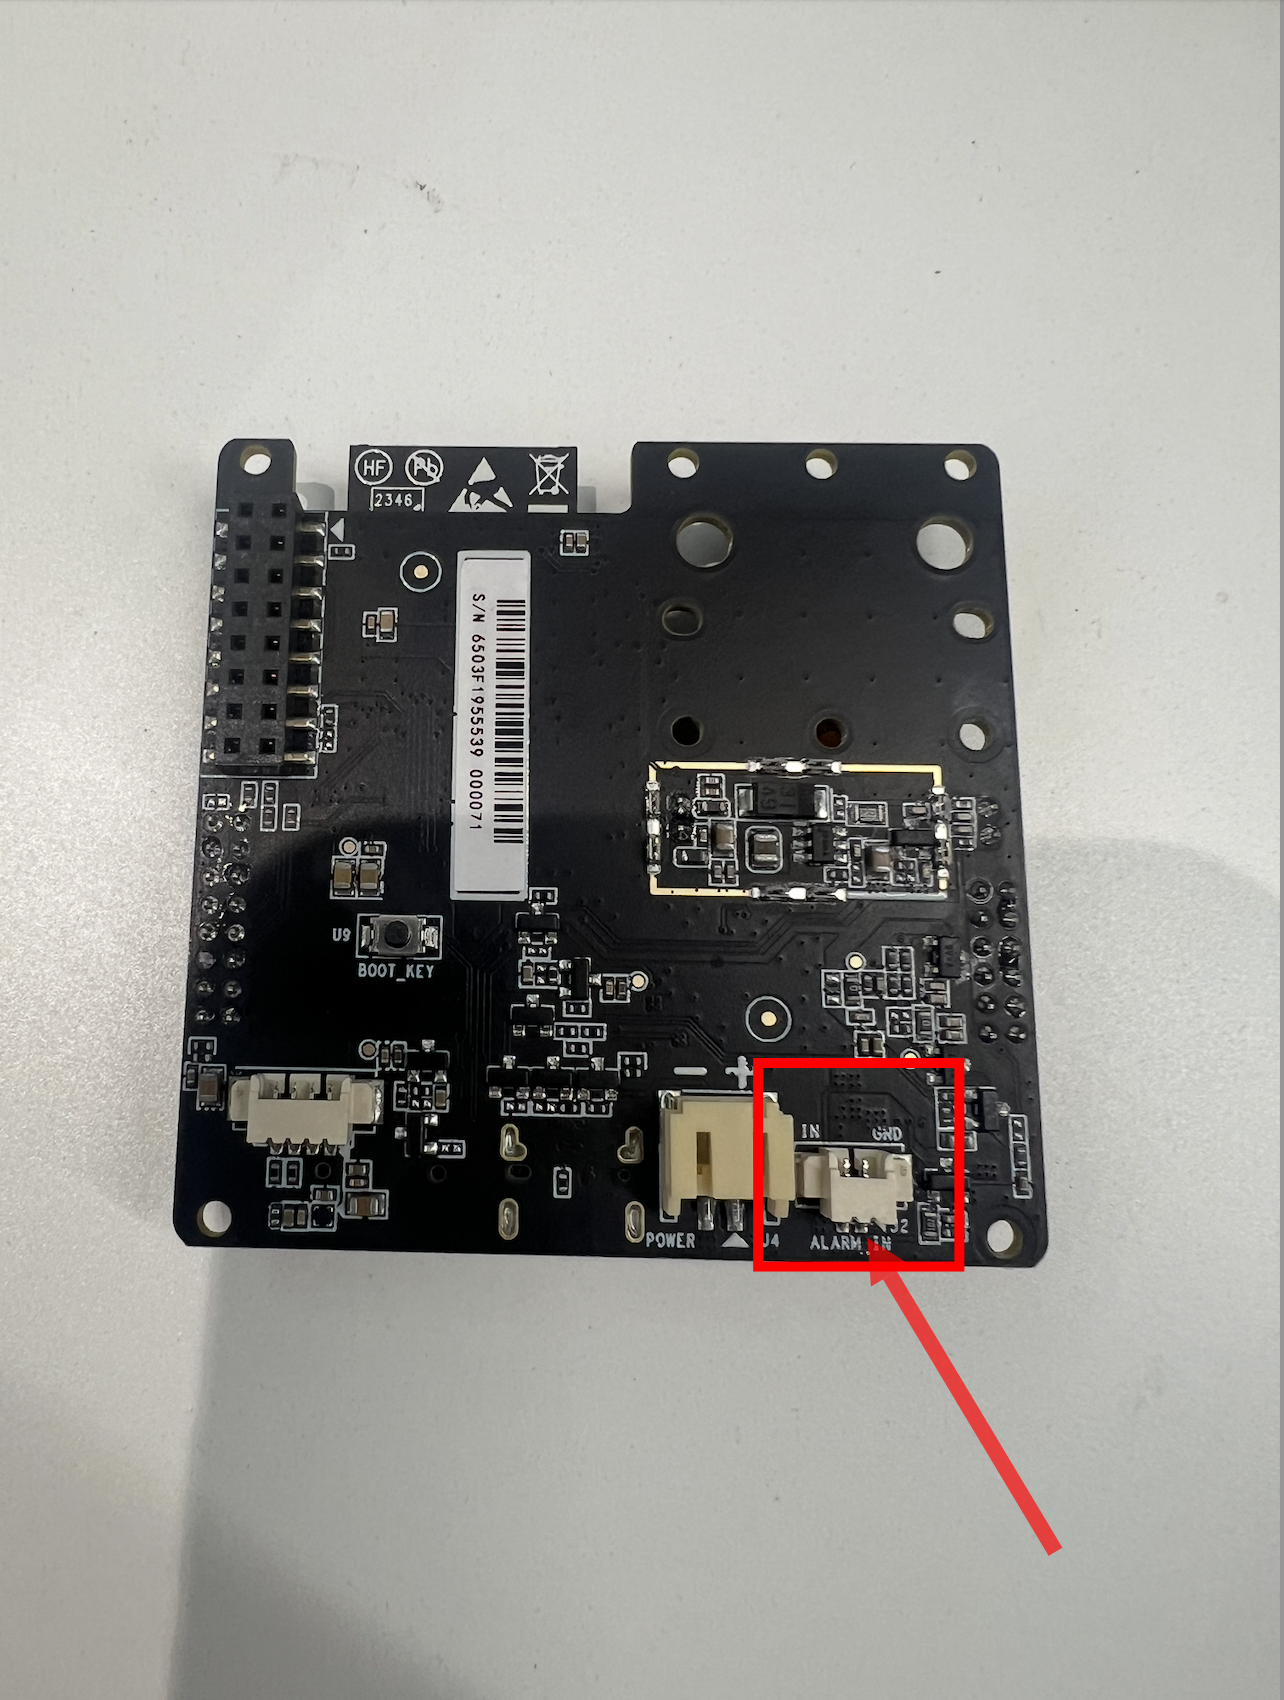
- Alarm-In image capture: Turn on the function,, the Alarm-In socket on the back of the camera motherboard inputs the signal for image capture.
- Use physical button for image capture: Suggest not to turn off this function. The on/off button on the right side of the camera can be used to capture the current image.
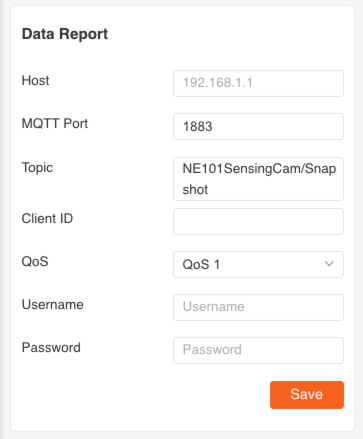
Data Reporting
Used to configure the MQTT for NE101 data reporting. After completing the information below, click the Save button to save the configuration.
- Host: used to fill in the domain name or IP address of the MQTT server.
- MQTT Port: used to fill in the MQTT subscription port number, the default setting is 1883.
- Topic: used to set the Topic for data reported by this camera.
- Client ID: used to identify the client's unique identifier in the MQTT service.
- QoS: MQTT QoS settings, supporting QoS 0, QoS 1, and QoS 2 options.
- Username: used to set the username required for verification to connect to the MQTT service.
- Password: used to set the password corresponding to the user name required for verification when connecting to the MQTT service. It needs to be the same as above.
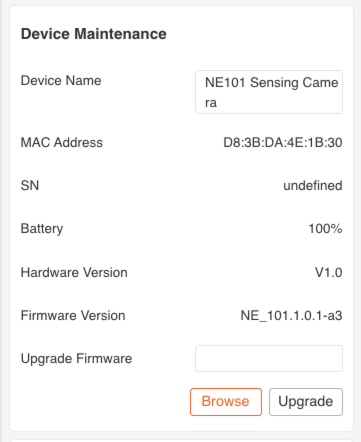
Device Management
Used to view the current device information of NE101 and support importing firmware packages for mirror updates.
- Device name: Supports modifying the device name of NE101. The device name is uploaded along with the image data after the device collects image data. This name is displayed in the devName information in the JSON data.
- MAC address: The MAC address of the device.
- SN: The unique identifier of the device, usually used for user identification and after-sales service.
- Battery: The current remaining battery power of the device.
- Hardware version: Current hardware version.
- Firmware version: The firmware version currently loaded on the hardware.
- Firmware update: Click the Browse button below to select the file on your computer or mobile phone. After selecting the mirror file that needs to be upgraded, you can click the Upgrade button to upload it for mirror update. Please note that the web page needs to be refreshed after the device update is completed, and in rare cases it is necessary to reconnect to the Wi-Fi AP of NE101.
Internet Connection
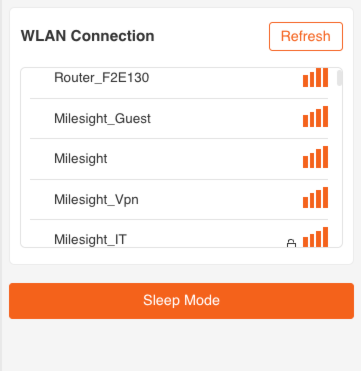
The network connection settings of NE101 vary according to the selected communication modules. There are mainly 3 communication methods that can be set: Wi-Fi, Cat.1, and Wi-Fi Halow. User can refer to the details below for communication settings.
- Wi-Fi Settings: The standard version of NE101 embedded with a Wi-Fi module. In the Wi-Fi version, user can search the Wi-Fi signals within the current range in the configuration interface. User can select settings according to the Wi-Fi that want to connect to. The device will automatically record the SSID and password of the Wi-Fi. If the Wi-Fi connected to NE101 is set repeatedly, the SSID and password stored by the device will always be the most recent one.
- Cat.1 Network Settings:The NE101 Cat.1 version supports network settings. User needs an activated SIM card in the current region. The current NE101 Cat.1 version supports global frequency bands except for North America. The following will explain how to set up the Cat.1 network.
- Use a screwdriver to open the front cover of the NE101.
- You can see the SIM card slot, insert the SIM card.
- Reinstall the front cover of the device.
- Open the browser, enter the device's configuration web page, and enter the information in the browser 192.168.1.1.
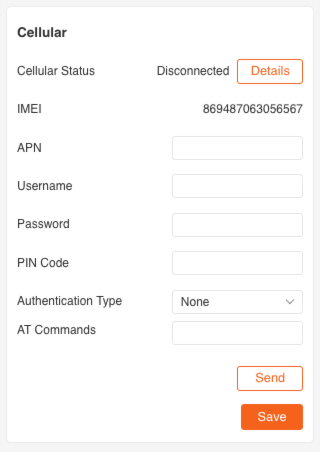
- Go to the Cellular configuration, and enter the APN, Username, Password, PIN Code, Authentication Type, and AT Commands as required according to the SIM card information provided by the operator. You can click the "Send" button to test the cellular network. If normal, the Cellular Status will change to the connected status, indicating that the network is functional, and then click save to save the information.
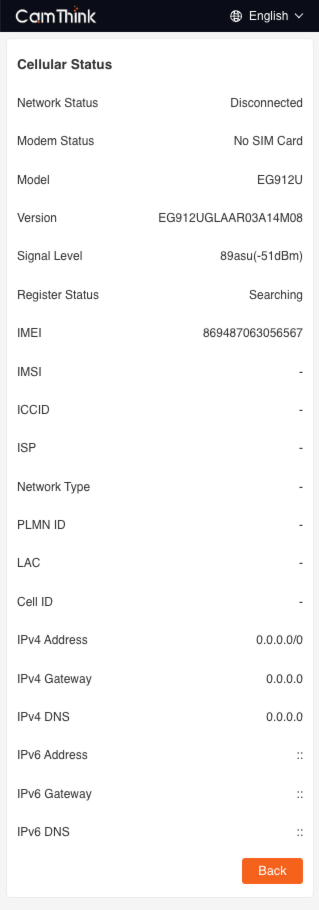
- User can view the detailed information of the network through the Details button. For displayed information, please refer to the image below.
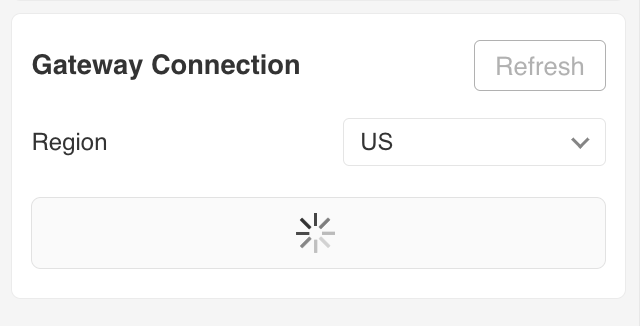
- Wi-Fi Halow Network Settings: The NE101 Wi-Fi Halow version supports network settings. User can refresh the current Wi-Fi Halow gateway signal through the Refresh button. Pull down the Region to select the corresponding regional frequency band, and find the required Wi-Fi Halow SSID to connect.


Equipment Debugging
When it is clear that the network settings and data reporting configurations of the device are normal, NE101 can capture and transmit images. The way to debug is to press the camera button of NE101 to collect images, and check whether the device data can be collected and transmitted to the MQTT server by checking whether the MQTT service has received the device data.
MQTTX Receives MQTT Data
In order to verify whether the data reporting function of the camera is functional, user can use the MQTT client tool(For example, MQTTX)to conduct data transmitting test.
Stey by Stey Introduction
It is necessary to ensure that the MQTT server can be connected by NE101
- Open MQTTX, and click
New Connection. - Set up the following connection parameters:
- Host:
192.168.44.80 - Port:
1884 - Client ID:any figure, for example
mqttx-client-01 - Topic:
left - Username / Password:Leave blank
- Host:
- After clicking the link, subscribe to Topic
left。 - User can press the camera button on the right side of the device to collect images.
- After the camera collects the image data, it will publish messages to the Topic through MQTT.
Data Format Description
The MQTT message payload content sent by the camera is in JSON format, as shown below:
{
  "ts": 1740640441620,
  "values": {
    "devSn": "undefined",
    "devName": "NE101 Sensing Camera",
    "devMac": "D8:3B:DA:4D:10:2C",
    "battery": 84,
    "snapType": "Button",
    "localtime": "2025-02-27 15:14:01",
    "imageSize": 74371,
    "image": "data:image/jpeg;base64,..."
  }
}
Field Description
ts:timestamp (milliseconds)devName:device namedevMac:device MAC addressbattery:battery level (percentage)snapType:image collection type(such asButton,Scheduled,PIRetc.)localtime:local time (string format)imageSize:image size (unit: bytes)image:Base64 encoded JPEG image data, prefixed withdata:image/jpeg;base64,
Visualization Suggestion
Use Base64 image data to quickly preview images on web pages or tools:
<img src="data:image/jpeg;base64,...">
you can also copy and paste the Base64 data to Base64 Image Viewer for online preview.
Camera Reset
The operation of resetting the camera is to press and hold the camera button for 10 seconds and wait for the light to flash rapidly 5 times, which means the device has been successfully reset. After the reset, the device system will restore to factory settings. Please operate with caution. After the reset is successful, the device will wait for the light to indicate that the system is ready. User can refer to「Device Configuration」to reconfigure the camera.
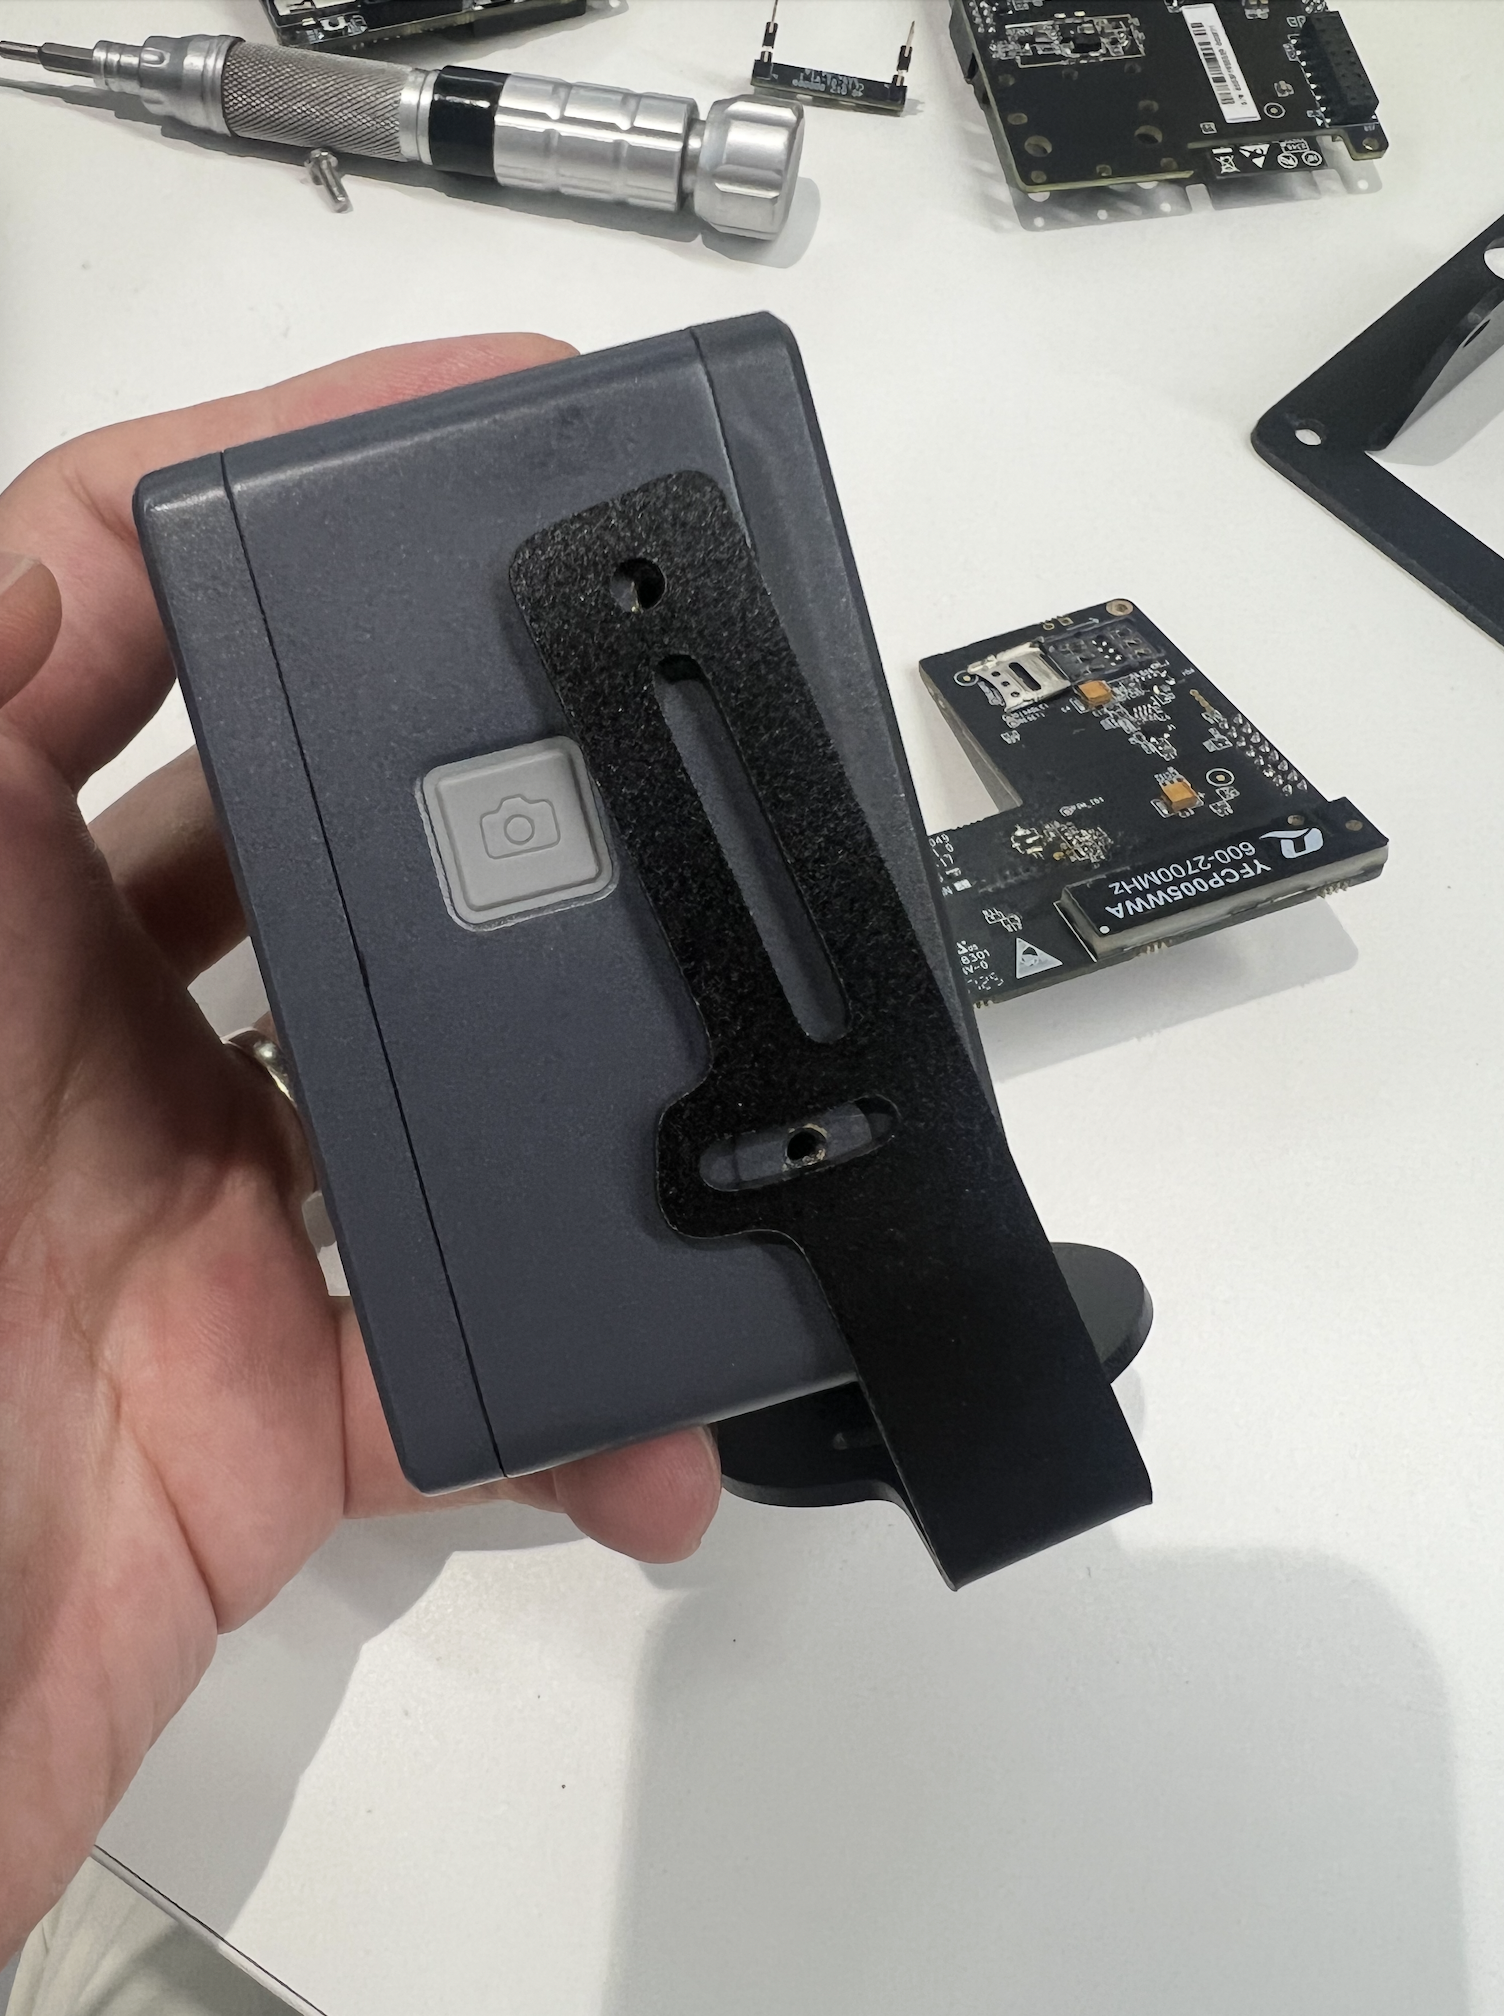
Product Installation
There are many options to install the NE101 event-triggered camera. User can choose from the various bracket options provided by CamThink for equipment installation. The following will explain how to use and install the main optional brackets simply.
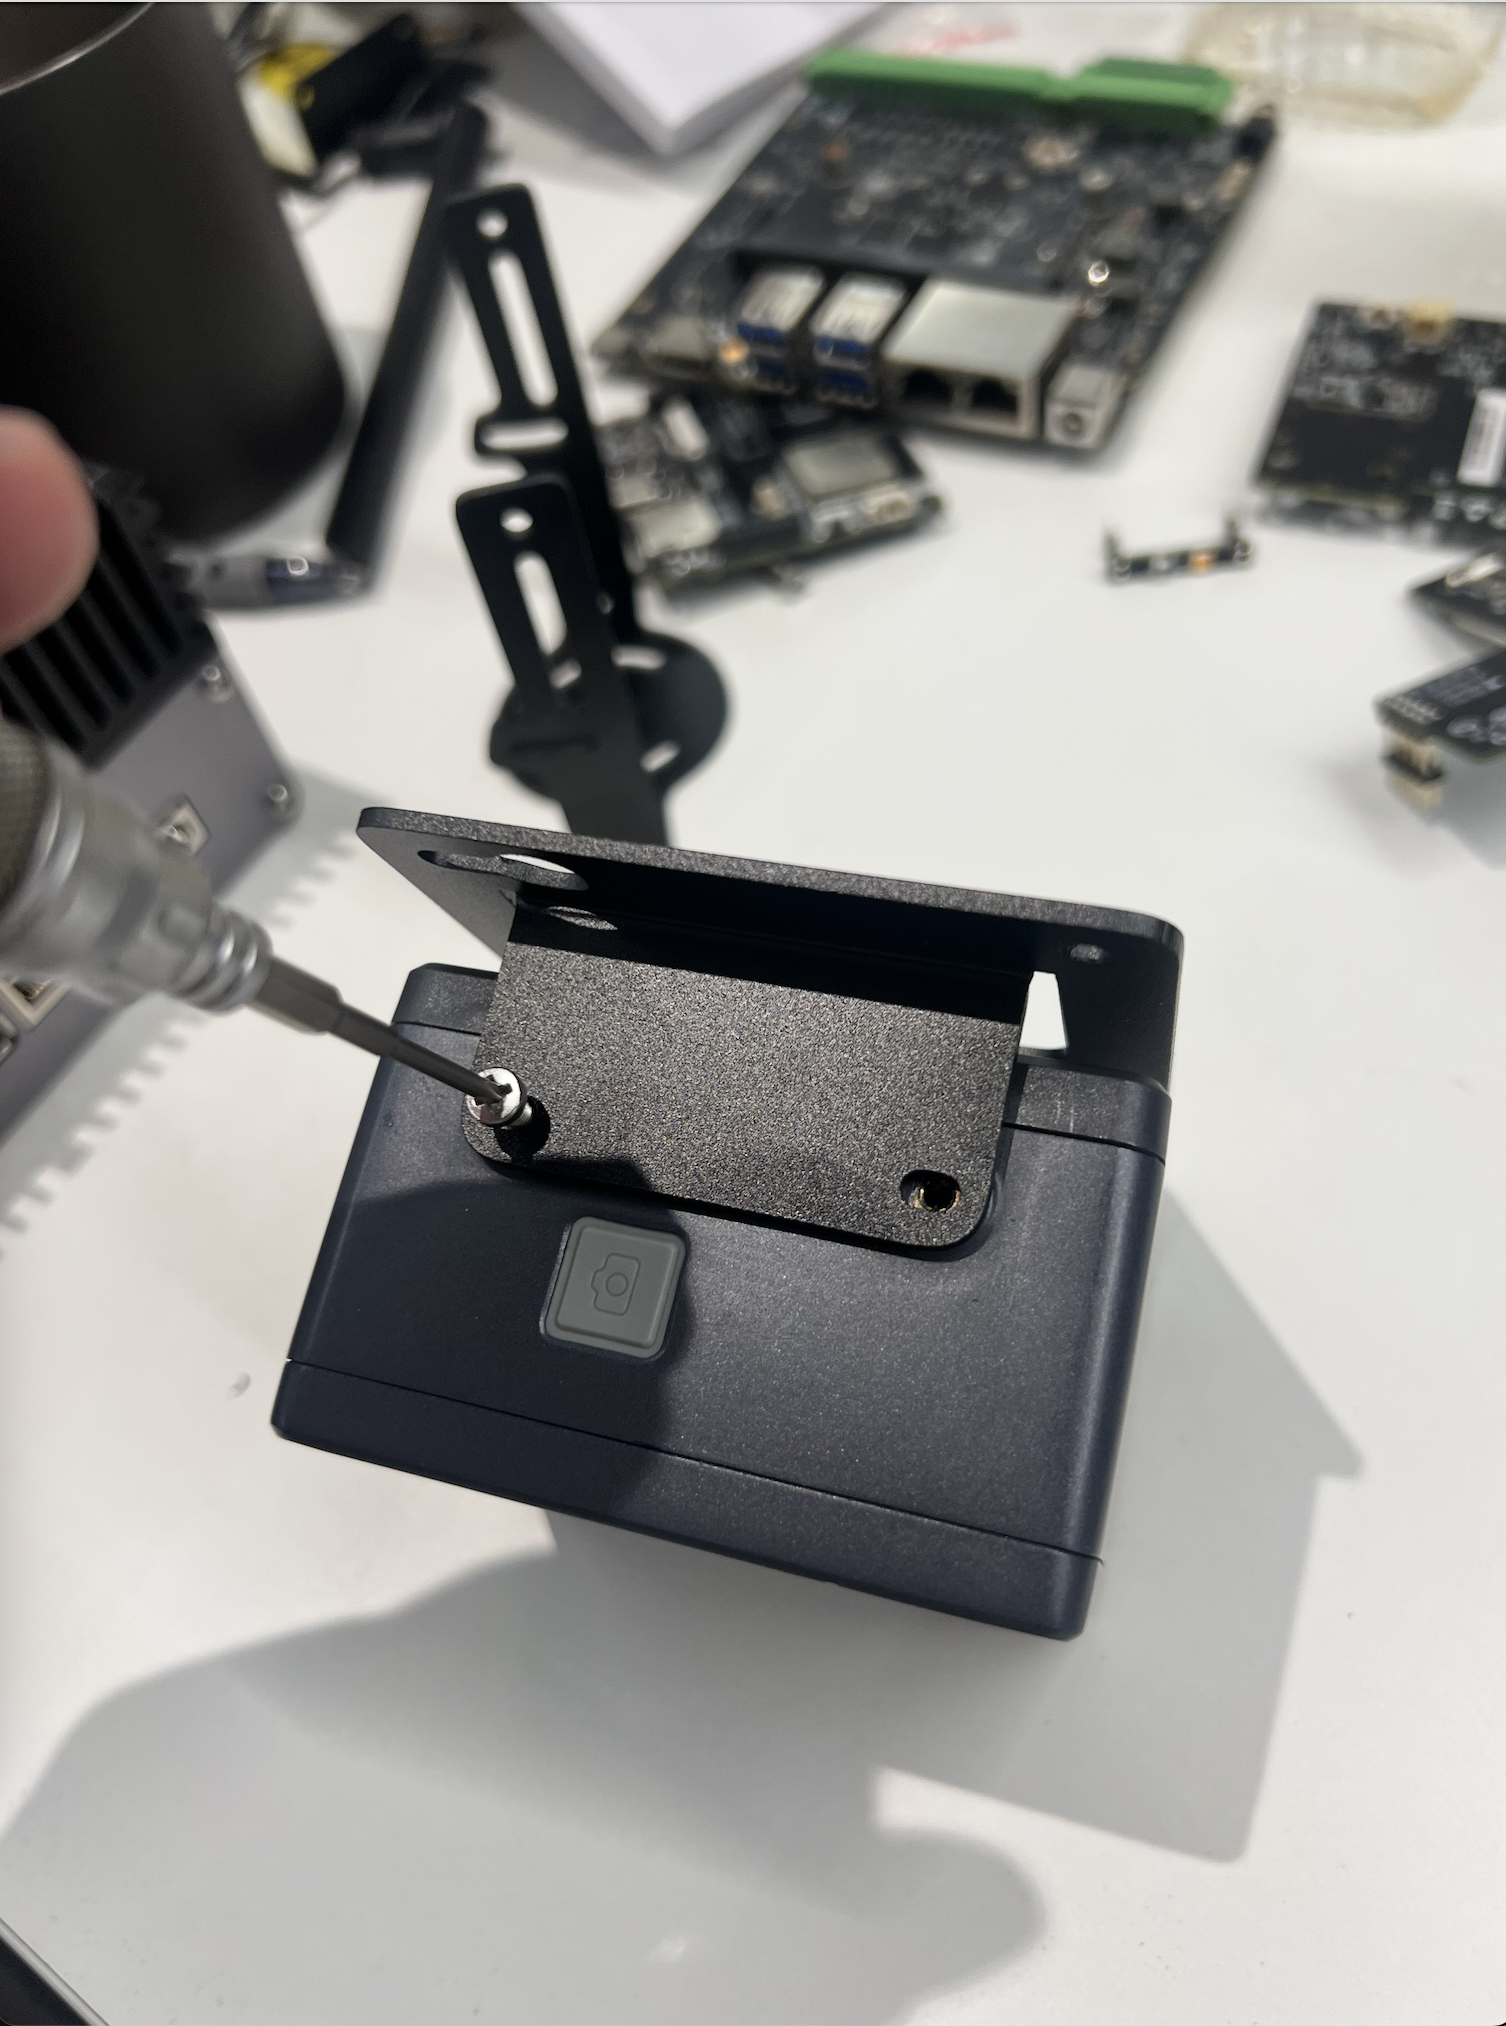
Desktop Bracket Extensions
Find the screw holes on the side of NE101, align the bracket with the camera, and fix it with screws after alignment. After the fixation is completed, you can rotate the bracket to adjust the angle, and drill holes for screws to fix the bottom of the bracket to the location where it needs to be installed fixedly.
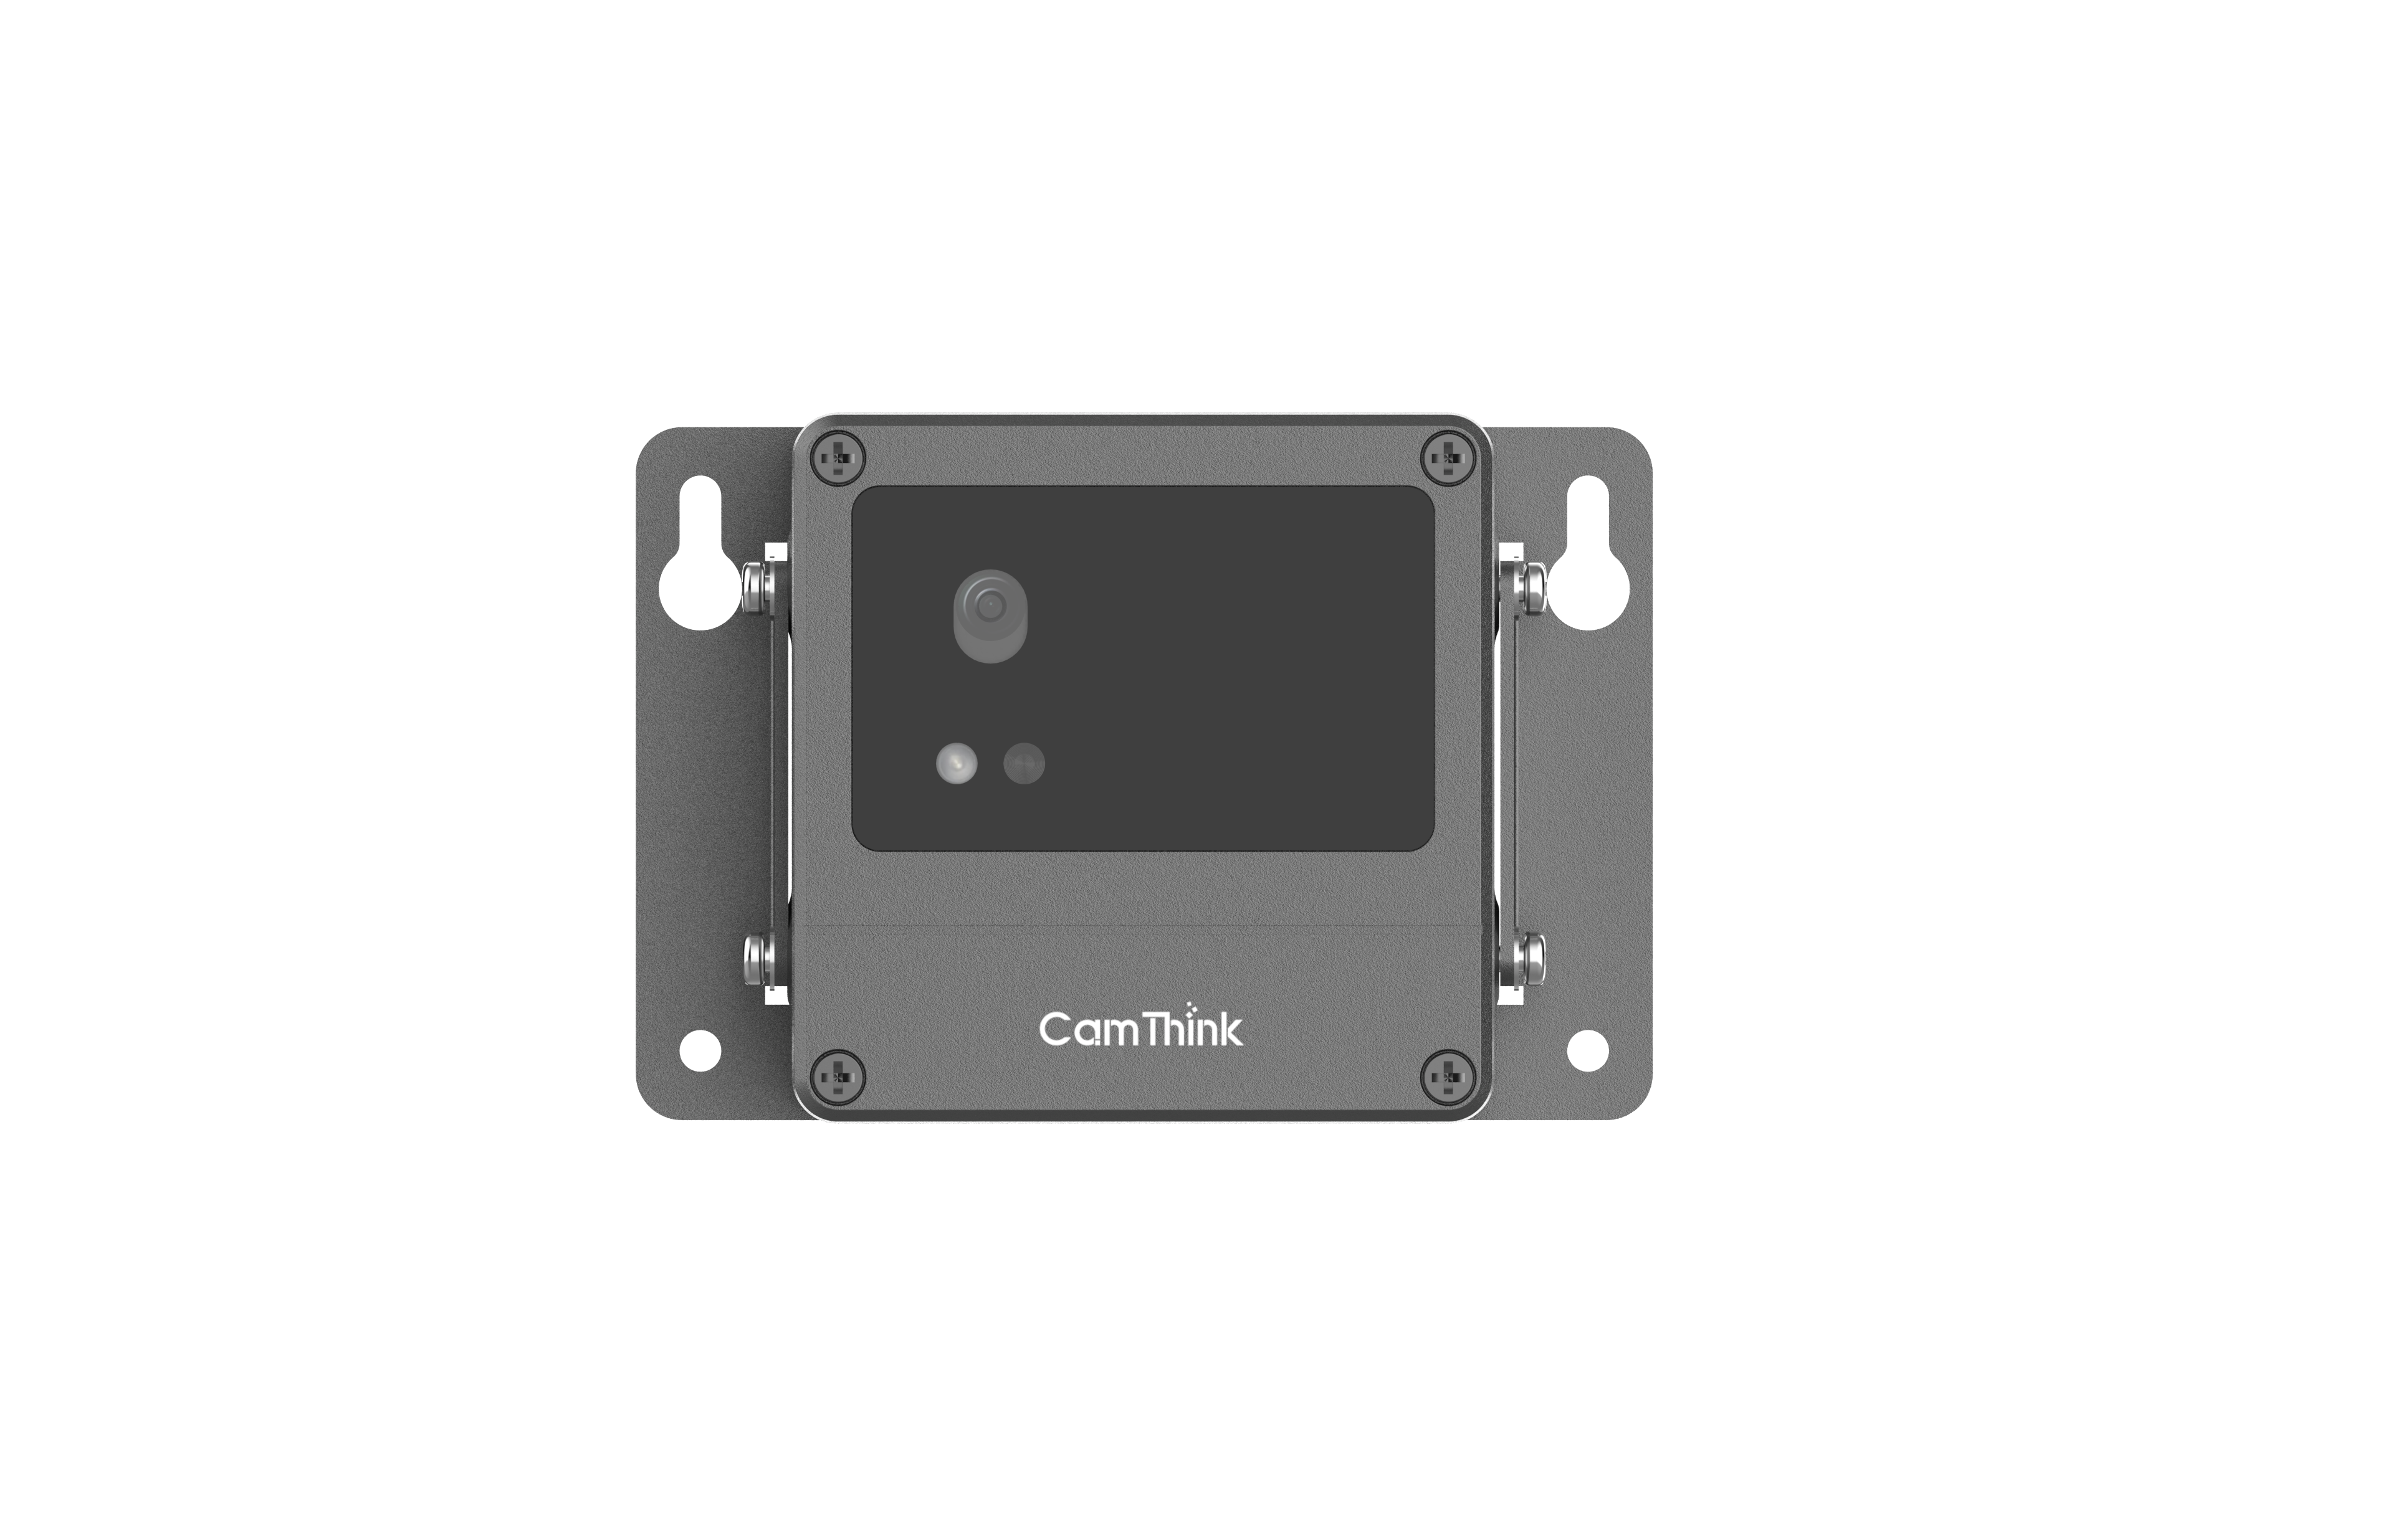
Wall/Back Bracket Extensions
Find the screw holes on the side of the NE101, align the bracket with the camera, and fix it with screws after alignment. Find the location where wall mounting is required, and screw the screw holes on the left and right sides of the bracket for installation.