Quick Start
Overview
This chapter mainly helps you to use NG4500 series products quickly.
Hardware Preparation
-
Hardware Guide, please reference to Hardware Component Overview
-
Assembly
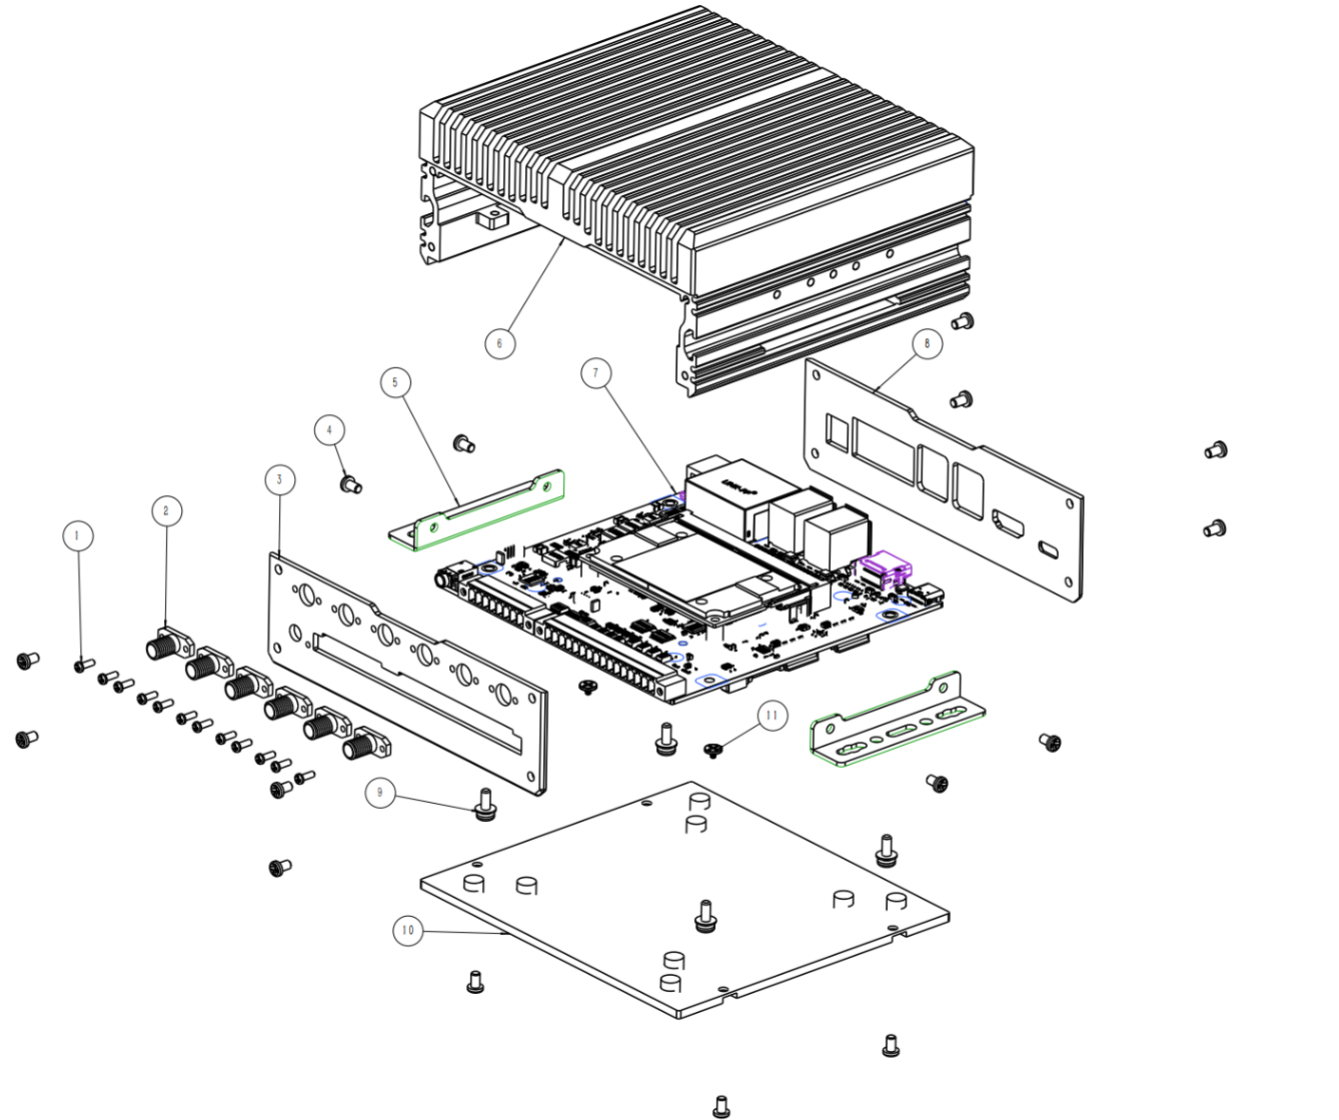
After receiving the NG4500 edge AI box, users should dismantle the back cover of the device and add the corresponding accessories before use, if it is not a pre-installed version.
- Unbox it and confirm that there is no defect in the appearance of the device;
- Remove the back cover;
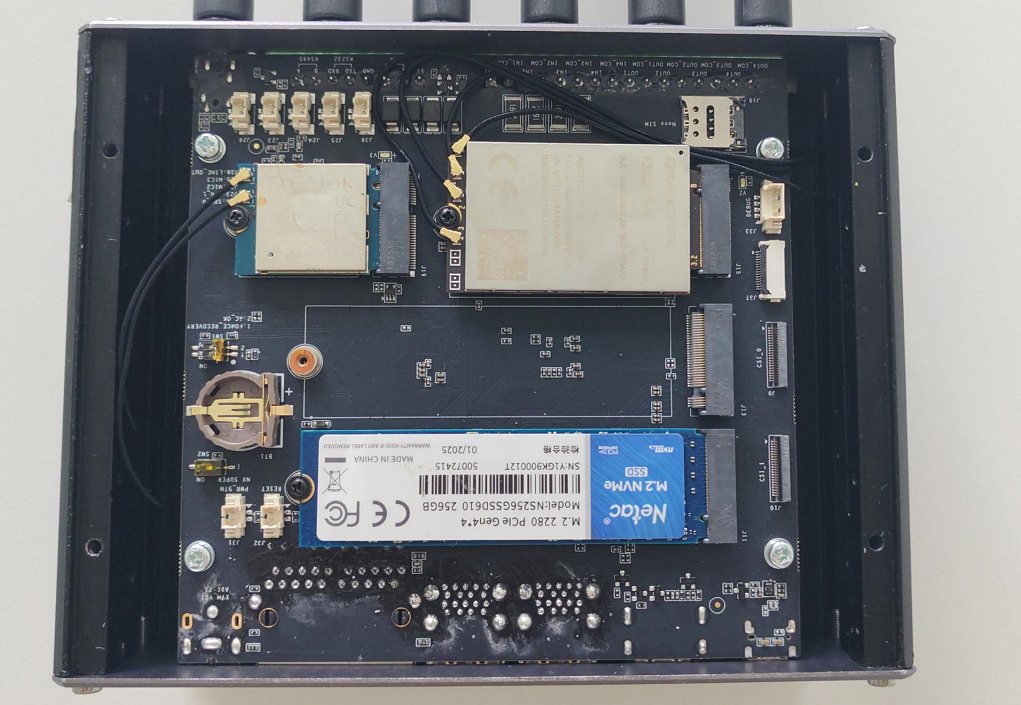
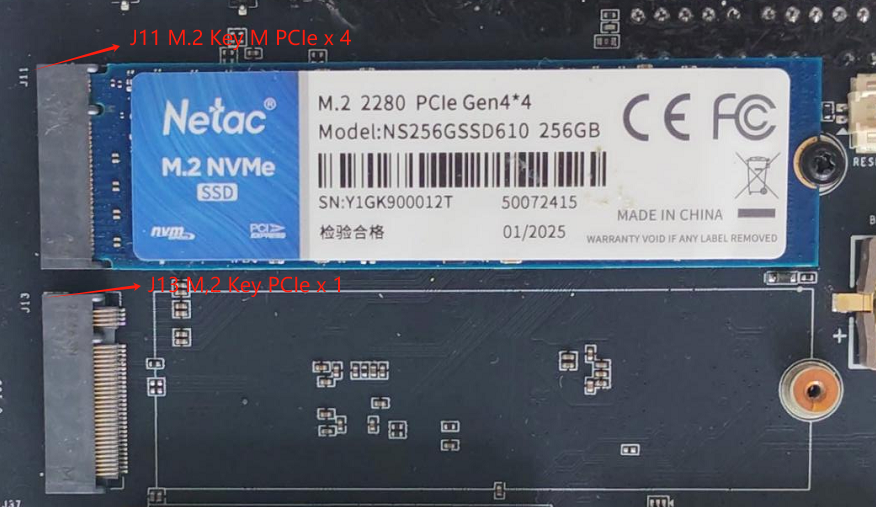
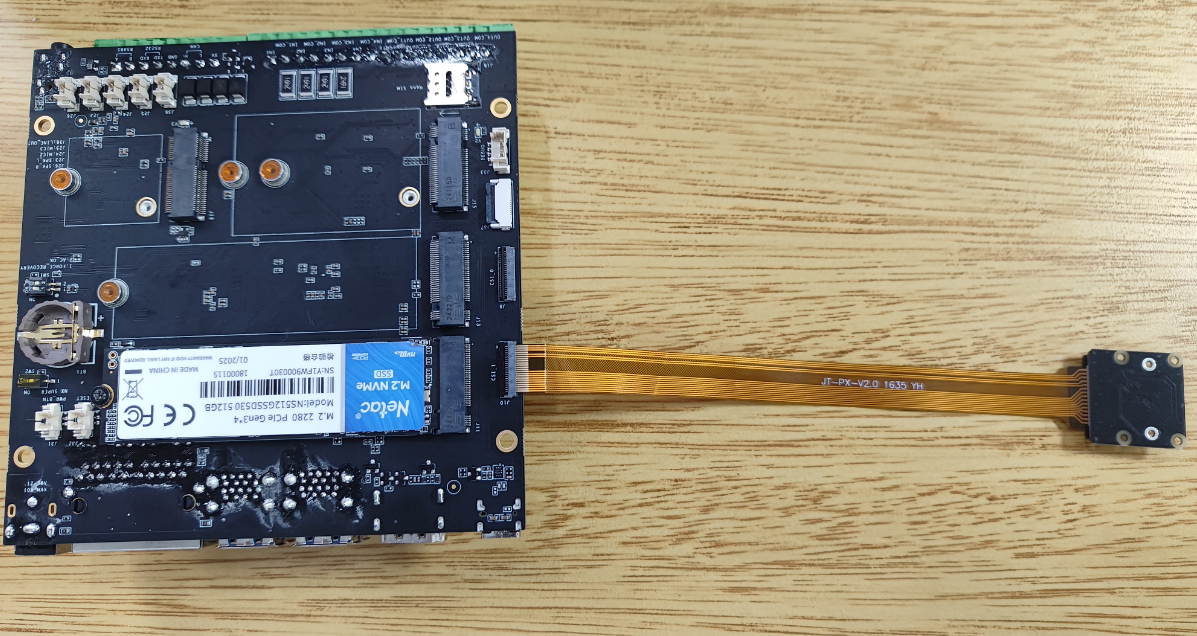
- Mount the SSD in the M.2 Key M PCIex4 interface of J11 (recommended), or the M.2 Key M PCIex1 interface of J13;
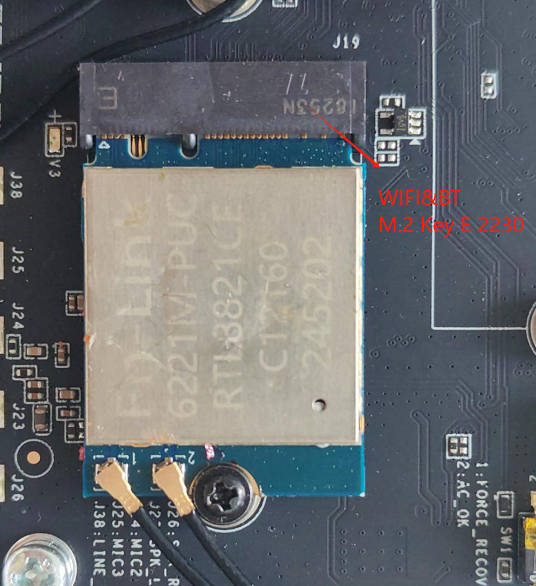
- Mount the Wi-Fi & BT module to the M.2 Key E 2230 of J19 and connect it to the external antenna (Optional);
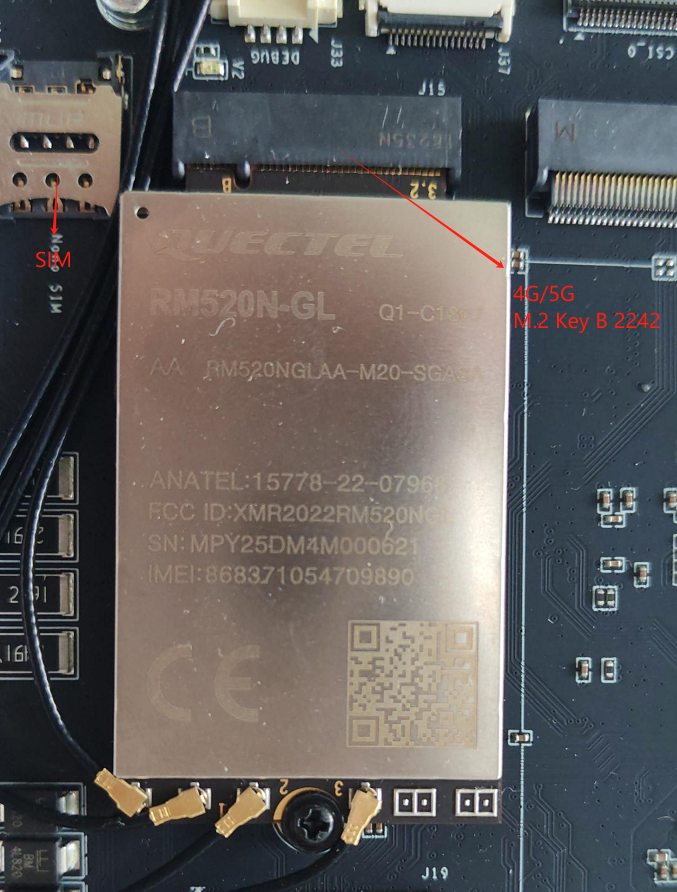
- Mount the 4G/5G module to the M.2 Key B 2242 of J15, insert the SIM card into the SIM card slot of J18, and connect it to the external antenna (Optional);
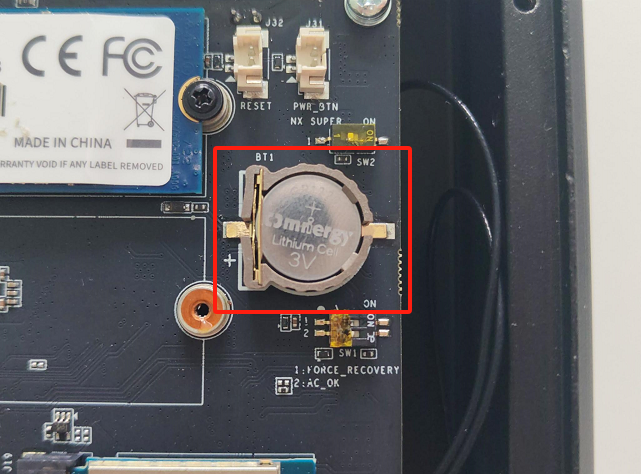
- Fix RTC Battery CR1220 to the Holder of BT1 (Optional);
- Installing the core module, first insert the gold finger end into the J1 slot at a 45° angle. Then, press the module downward by hand until the metal locks on both sides automatically engage to ensure secure installation. To remove the module, release the metal locks on both sides first, and then pull the module out.

- After confirming that the installation is complete, re-lock the back cover;
- The diagram below presents an exploded view of the device structure.
-
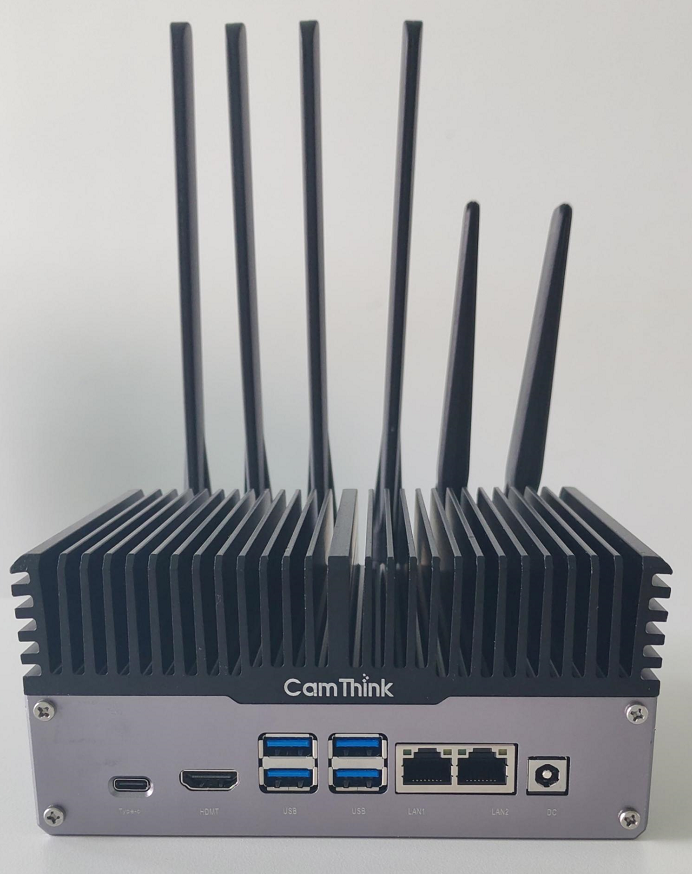
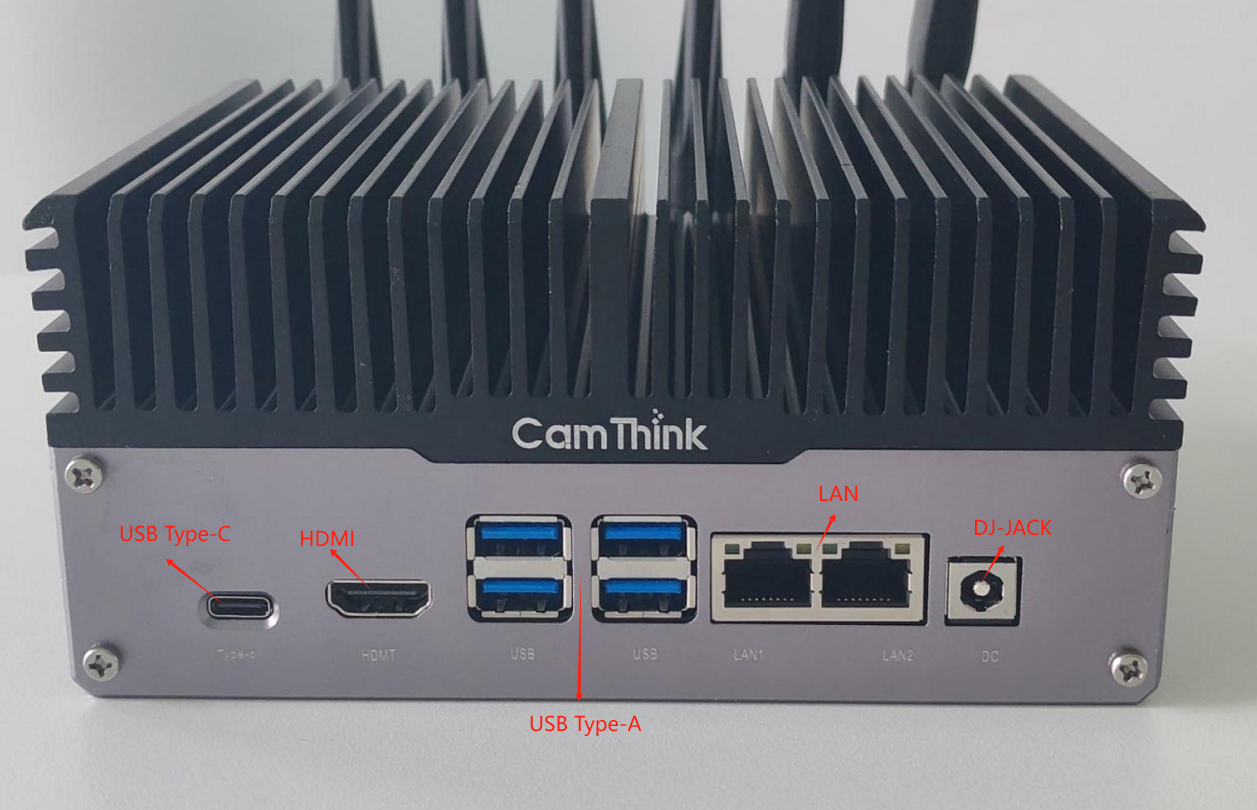
Use the HDMI interface to connect to an external monitor;
-
Connect the wired mouse and keypad to any two of the USB Type-A interfaces;
-
Connect the network cable to any one of the LAN ports;
-
Connect the USB Type-C interface to the debugging computer;
-
After confirming that the above operations are correct, connect the power adapter to DC-JACK and start kit development and debugging.
[!WARNING]
1、Please use the original standard adapter;
2、Orin Nano 4/8G only supports 5V voltage input, please make sure that the “Power Mode Switch” remains OFF.
Software Deployment
If the device has not yet flashed firmware, please refer to the following link to complete the firmware flashing steps; if you have completed firmware flashing, you can deploy it directly.
-
Environment Setup, software development environment, please refer to Development Environment Setup
-
Firmware Flashing,, for detailed firmware flashing steps, please refer to System Firmware Flashing
First-time System Boot Configuration
After confirming that the device has completed firmware flashing, power on the NG4500 device and follow the on-screen prompts to complete the first-time system initialization configuration.
1. System Initialization Configuration
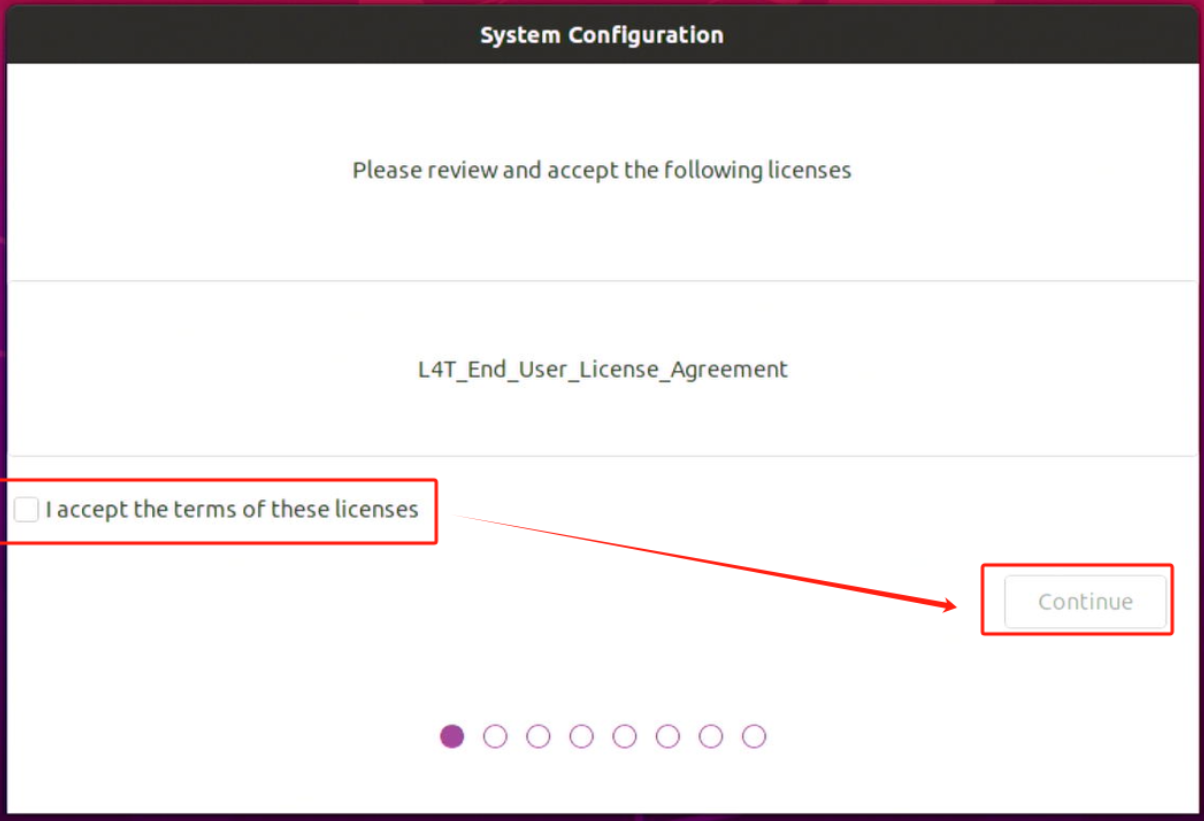
- Click
Accept License Agreement, then click next step;
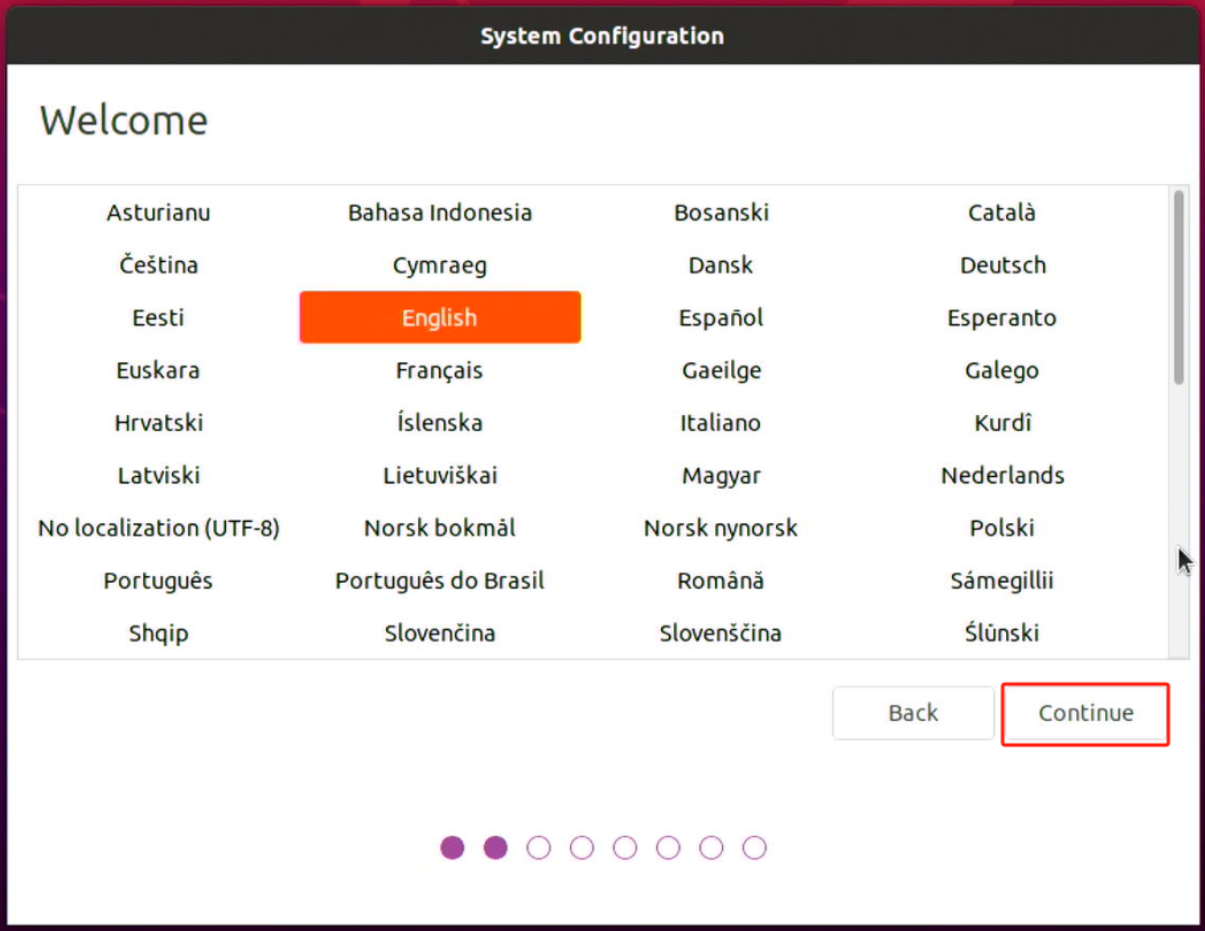
- Select language, then click next step;
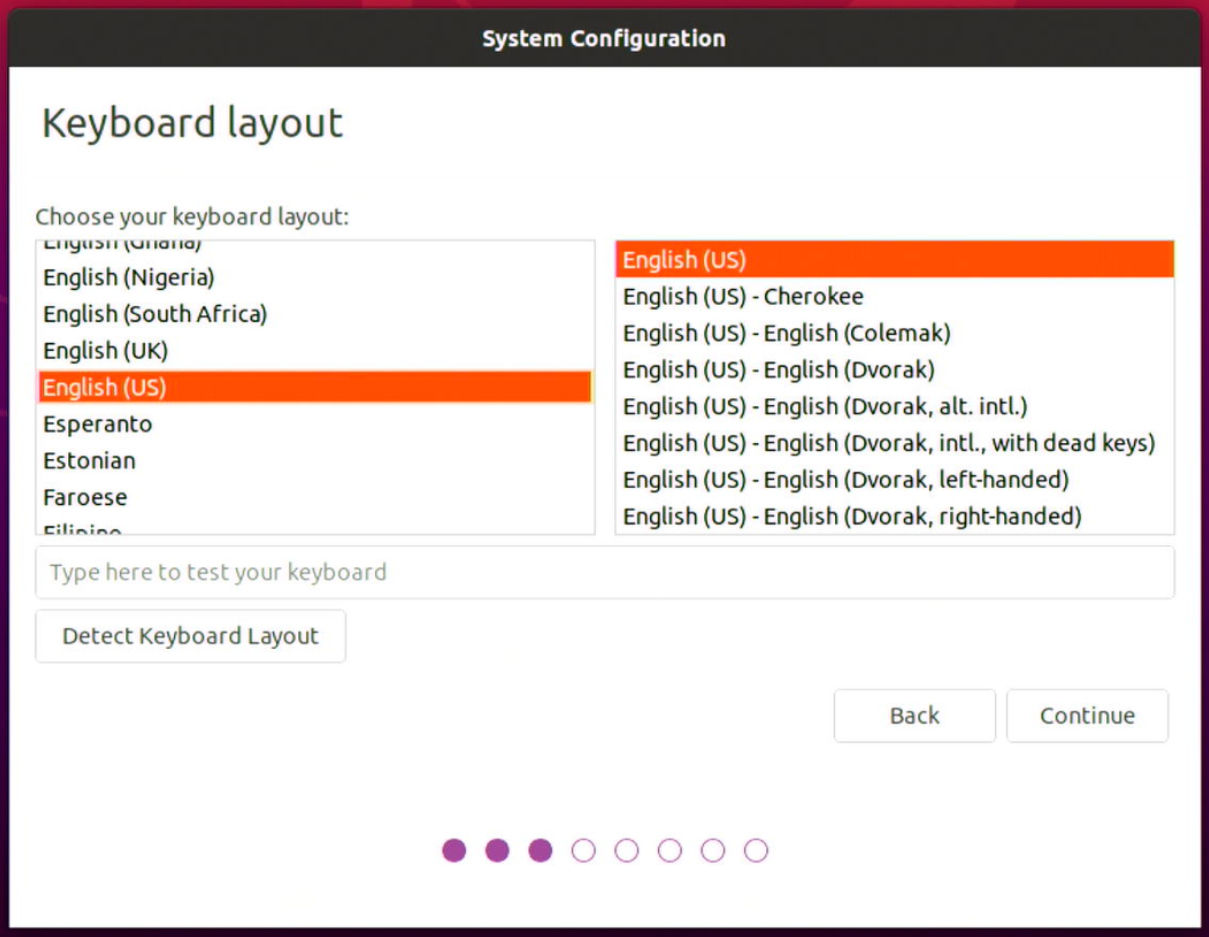
- Set up the keyboard layout, then click next step;
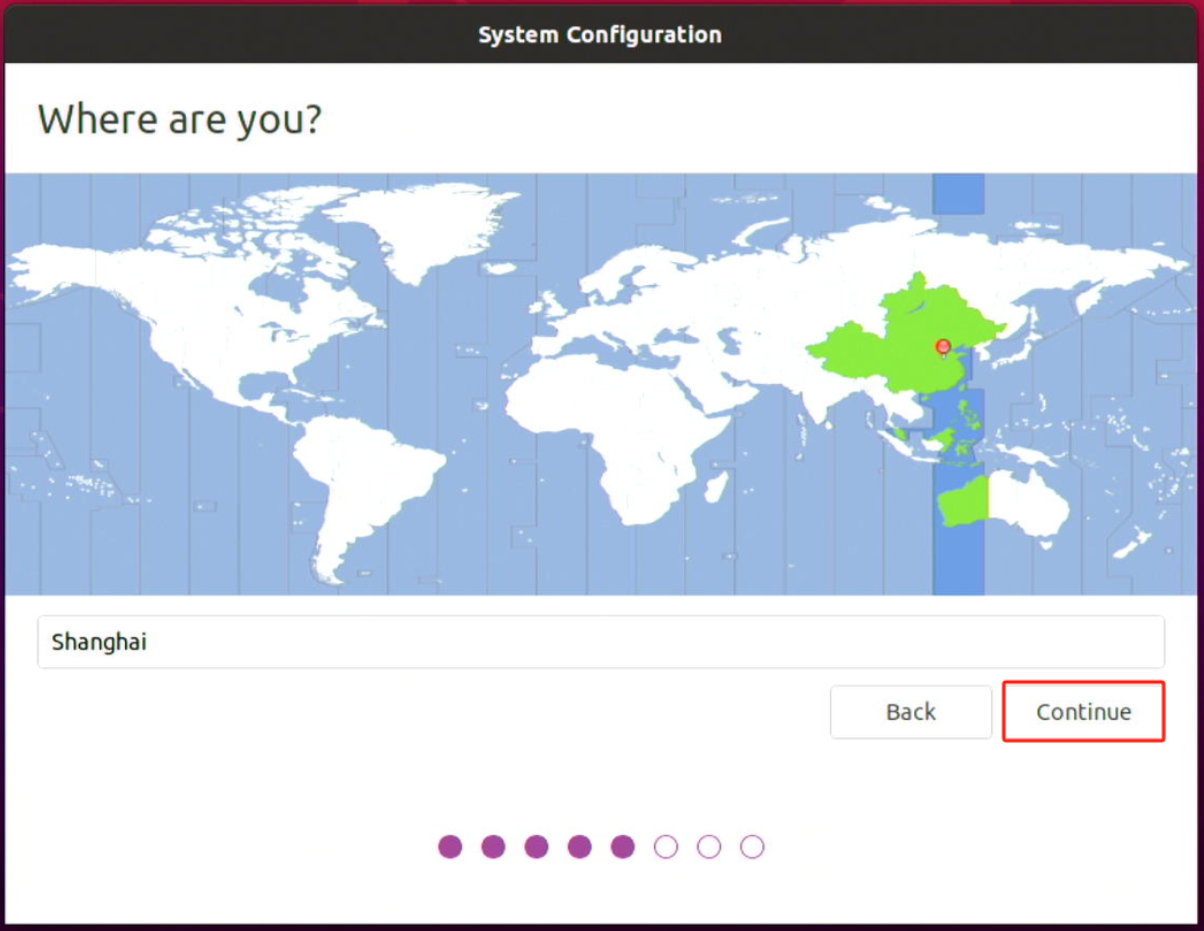
- Set up time zone(for example:
Asia/Shanghai), then click next step;
- Set up “your name” and “password”, then click next step;
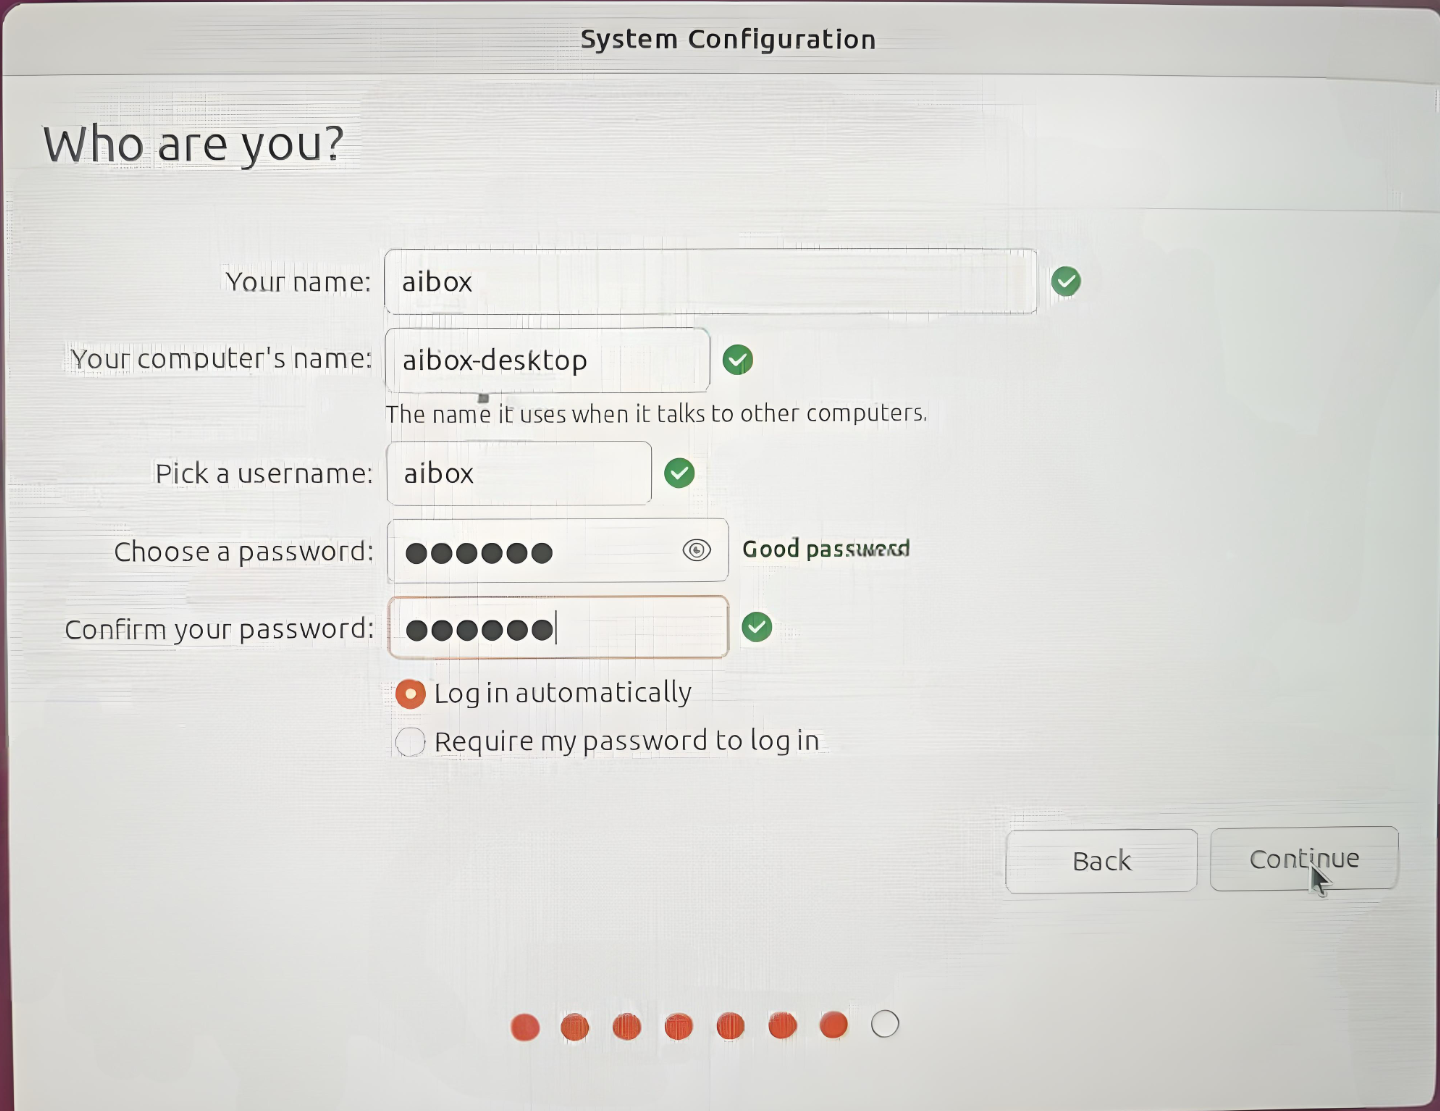
- Finally, wait for the system installation and restart.
2. System Operation Status & Version Confirmation
Please follow the steps below to install the Jtop tool to monitor the current device resource usage:
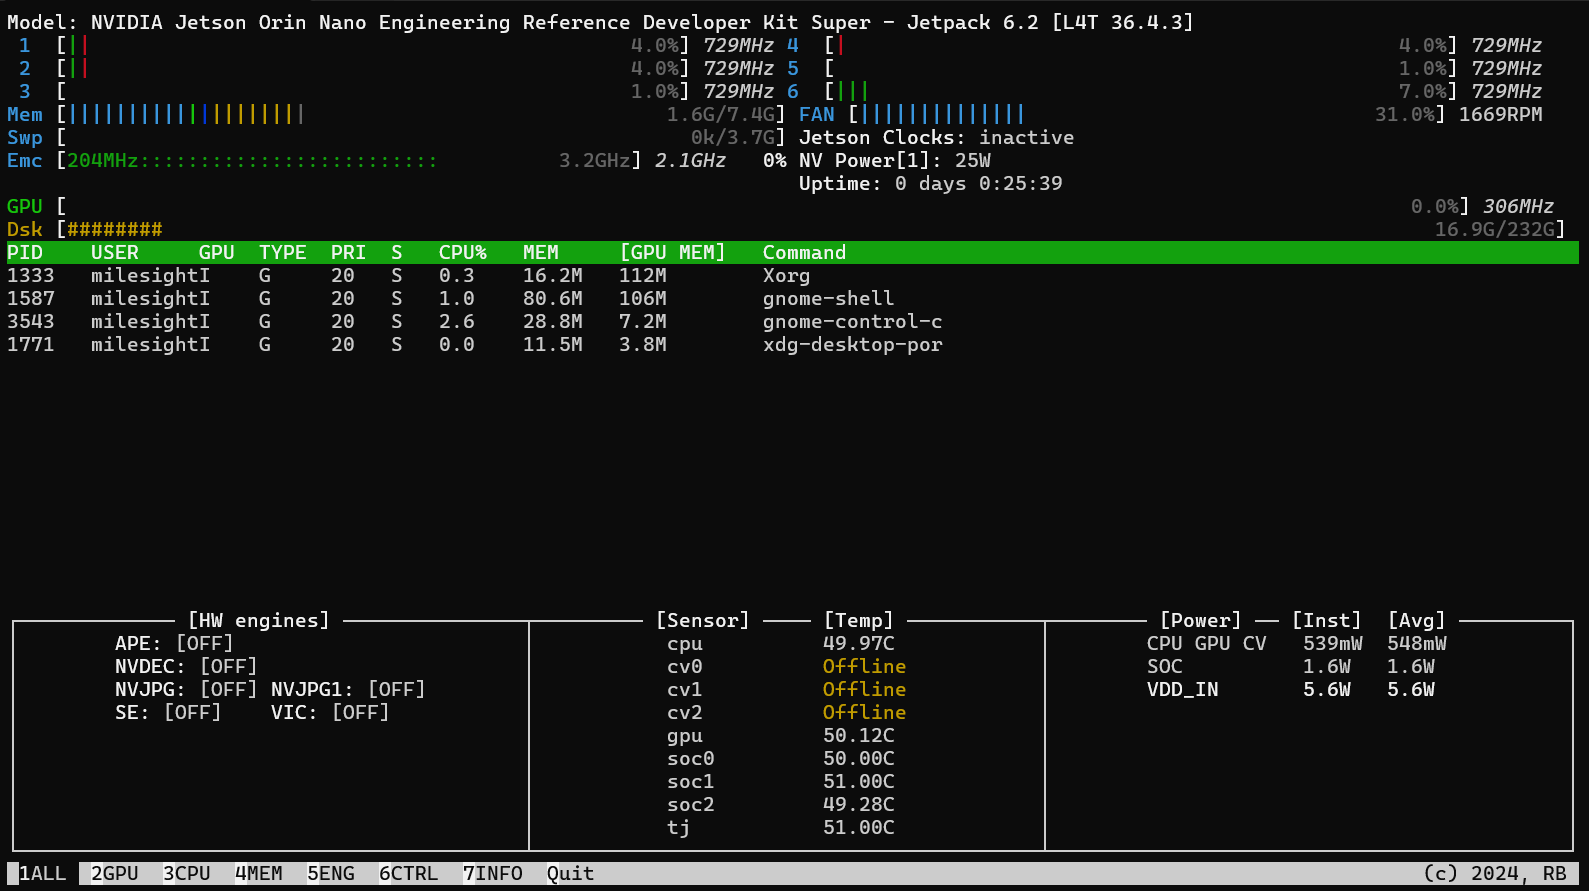
After installing and running Jtop, the interface will display the information shown in the screenshot below. Users can use the keyboard to view the current resource usage of the Jetson device in real-time, including CPU, memory, GPU, disk, fan, etc. At the same time, users can also confirm the current version of TensorRT, CUDA installed on the current system.
# Install Jtop tool
sudo apt update
sudo apt install python3-pip
sudo pip3 install -U jetson-stats

# Reboot
sudo systemctl restart jtop.service

#Run Jtop
sudo jtop
After running, as shown in the screenshot below, use the keyboard to check the resource usages of the current Jetson device, including CPU, memory, GPU, disk, fan, etc., and confirm the versions of TensorRT, CUDA, etc. currently installed on the system.
Model Deployment
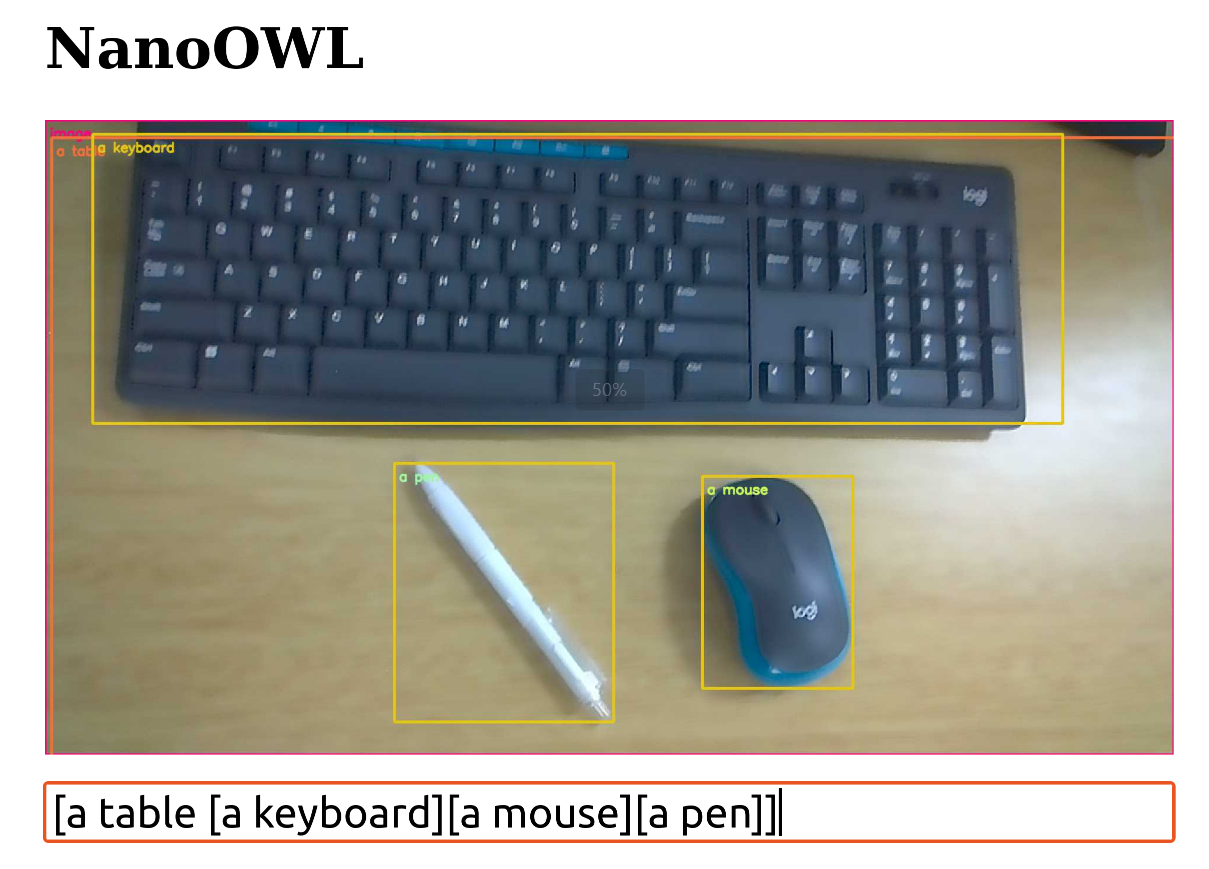
The introduction of how to deploy and run the NanoOWL real-time visual reasoning model on CamThink NeoEdge NG4500 Edge AI Box is shown below. Take NG4511 as an example and use the imx219 camera.
Hardware Requirements
| Components | Requirements |
|---|---|
| Device | Jetson Orin(Nano / NX) |
| Memory | ≥ 8GB(Larger models demand for high-capacity memory) |
| Storage | ≥ 10GB(Depends on the model size) |
| GPU | NVIDIA GPU supports CUDA |
Software Environment
- Supported JetPack versions:
- JetPack 5 (L4T r35.x)
- JetPack 6 (L4T r36.x) (by default)
Environment Preparation
-
Connect the IMX219 camera to the device (Note: Please ensure that the metal piece of the camera cable is facing upwards).
-
Please follow the steps below to install the required dependencies to ensure the model runs properly.
sudo apt update
sudo apt-get install -y docker.io
sudo apt-get install -y nvidia-container-toolkit
sudo apt-get install nvidia-jetpack
- Install jetson-containers
# Access the source code
git clone https://github.com/dusty-nv/jetson-containers

# Install dependencies
bash jetson-containers/install.sh
- Start deployment and automatically pull/build nanoowl containers. (Note: After the container is downloaded or built, the system will automatically start the container.)
cd jetson-containers/
jetson-containers run --workdir /opt/nanoowl $(autotag nanoowl)
This command will automatically detect your hardware configuration and pull or build the appropriate container image.
Run the Sample
-
Check the camera
Please make sure that the camera is connected to the device correctly and can be recognized by the system. Users can check the currently connected camera devices using the following command:
ls /dev/video*
-
Run NanoOWL container and finish the following configuration.
- Start Docker container and enter the sample test directory
cd jetson-containers/
jetson-containers run --workdir /opt/nanoowl $(autotag nanoowl)

# Enter the test case route
cd /opt/nanoowl/examples/tree_demo- Install dependencies
apt update
apt-get install vim
pip install aiohttp- Modify
/opt/nanoowl/examples/tree_demodocument
# Open the file, after modification, use crtl+0 and press Enter to save, crtl+X to exit.
$ nano tree_demo.py

# Block the following code
camera = cv2.VideoCapture(CAMERA_DEVICE)

# And replace with the following description
gst_pipeline = (
    "nvarguscamerasrc ! "
    "video/x-raw(memory:NVMM), width=(int)1280, height=(int)720, format=(string)NV12, framerate=(fraction)30/1 ! "
    "nvvidconv ! "
    "video/x-raw, format=(string)BGRx ! "
    "videoconvert ! "
    "video/x-raw, format=(string)BGR ! "
    "appsink"
)
camera = cv2.VideoCapture(gst_pipeline, cv2.CAP_GSTREAMER) -
Start the device and run the test case
python3 tree_demo.py --camera 0 --resolution 1920x1080 --port 8080 ../../data/owl_image_encoder_patch32.engine -
Check the recognition performance
- Enter the IP address and port number of the current NG4511 device in the browser address bar (for example:
http://<ip address>:8080) to access the NanoOWL web interface. - Enter the content you wish to identify in the input box, for example:
- [a face [a nose, an eye, a mouth]]
- [a table [a keyboard, a pen, a mouse]]
- Enter the IP address and port number of the current NG4511 device in the browser address bar (for example: